Plush Button Badge File Setup: Orientation and Bleed
Plush Button Badge File Setup: Orientation and Bleed
Why the pin-back position makes file rotation a non-recoverable production error.
TL;DR
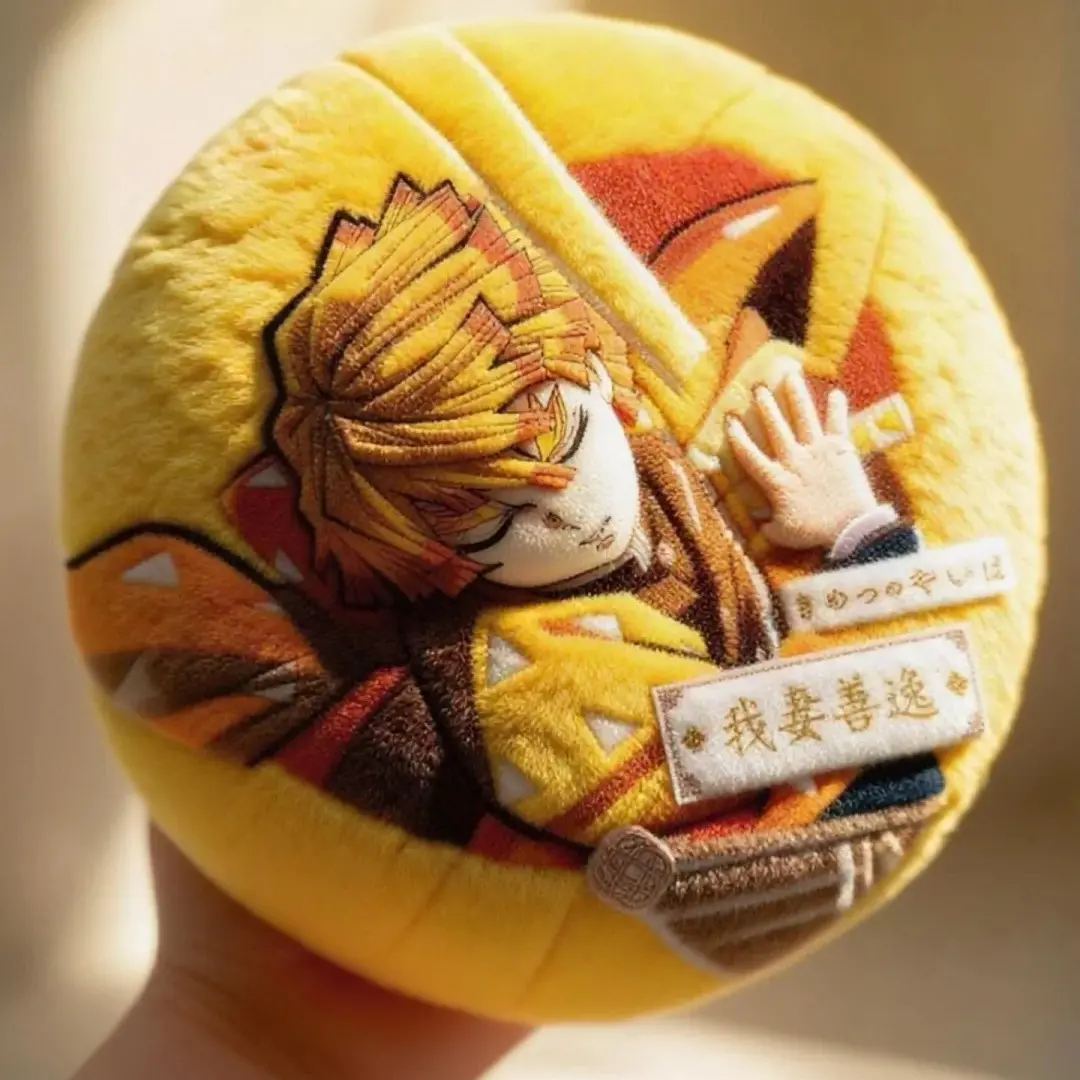
A plush button badge from Popecho is a 158 mm round velvet-face badge — exactly the diameter of an instant-noodle cup lid — printed via sublimation onto short-pile crystal velvet over a 10 mm foam core. The single most consequential decision at file-prep time is orientation: the safety-pin back is fixed, so a rotated artwork file produces a permanently sideways badge. Set your canvas to 184 × 184 mm in RGB, keep faces inside the 158 mm circle, and open the product in Popecho's onsite editor to see the live die-cut boundary before you finalise anything.
What This Subtype Actually Demands
The plush button badge is not a scaled-up flat pin. Its identity comes from three converging facts: a 158 mm finished diameter that physically matches a standard instant-noodle cup lid, a short-pile crystal-velvet face that prints soft and warm rather than sharp and cool, and a fixed-orientation safety-pin back that makes file rotation a production error you cannot fix after the job runs. Every setup decision flows from one of those three constraints. The velvet substrate rewards bold, well-scaled artwork and punishes fine linework near the cut edge. The foam core gives the badge its squishy, springy resistance — the tactile reason people pick it up and don't put it down — but that foam also stretches the velvet over the edge, which means anything placed too close to the die-cut line will distort or clip.
Setting Up the Artwork
Open the product in Popecho's onsite editor and the die-cut boundary appears as a live guide at 158 mm diameter — you do not need to calculate or draw it yourself. The full canvas is 184 × 184 mm at 300 DPI. The difference between the two dimensions is the 26 mm bleed band on all sides; this band wraps around the badge's side and back during production, so it must carry background fill, not important artwork.
Work at 300 DPI and stay in RGB colour mode throughout. The editor displays an RGB preview, which is what production reads — CMYK values submitted outside that mode will shift unpredictably on the velvet surface. Keep all character faces, key text, and recognisable design elements well inside the 158 mm finished circle. The editor's die-cut overlay makes this boundary visible while you work.
File orientation is critical: submit artwork upright — portrait vertical, not rotated. Popecho's editor shows the pin-back alignment relative to the canvas so you can confirm face direction before upload. Files must be PNG, JPG, or JPEG under 2 MB. Any region of the canvas left empty defaults to white in production, so fill the full 184 × 184 mm canvas with a background colour if you want a specific wrap colour on the side and back.
Surface and Production Decisions
Colour output on the velvet face will look softer and slightly warmer than your screen preview. The short pile of the crystal-velvet substrate absorbs dye unevenly compared to a flat rigid surface, and Popecho's production notes confirm that colour and lightness variation of up to ±20% is within the normal range for this material. Practically, this means two things: push your artwork contrast a little higher than you think you need, and avoid large areas of highly saturated, deeply dark fill — the velvet pile creates a subtle golden shimmer especially visible over plain dark backgrounds.
Fine linework and small text are the other material consequence. The velvet pile surface blurs anything under roughly 4–5 pt at finished size; photorealistic character faces print well, but tiny lettering near the bleed zone will likely be illegible and falls outside Popecho's after-sales scope. The foam core lamination beneath the velvet is fixed at approximately 10 mm — this is not adjustable per order — but it is what gives the badge its characteristic squishy resistance and the dimensional lift that makes the instant-noodle-lid concept land visually and physically when photographed on an actual cup.
What Trips Creators Up
Rotated file, sideways badge. The pin-back position is fixed relative to the face. If you submit a landscape-oriented file or rotate your artwork to fit a composition, the finished badge will pin sideways on a jacket. There is no post-production correction. Confirm orientation in Popecho's editor before uploading.
CMYK submission on a velvet substrate. CMYK colour builds shift unpredictably when sublimated onto the crystal-velvet face. Convert your file to RGB before upload — the editor preview shows RGB values, which is what Popecho's production reads.
Artwork pushed to the edge. Creators who are used to flat acrylic or metal badges often run design elements right to the die-cut line. On this product, the velvet stretches over the foam during assembly and anything near the edge wraps and distorts. Keep faces and text with clear margin inside the 158 mm circle.
Empty canvas areas turning white. Any part of your 184 × 184 mm canvas that has no artwork defaults to white in production. If you want a coloured side-wrap, flood the full canvas with your background colour — do not leave the bleed band transparent or empty.