Rotating Acrylic Standee: File Setup at 6 cm Scale
Rotating Acrylic Standee: File Setup at 6 cm Scale
Why miniature proportions, sandwich lamination, and CMYK discipline decide the result.
TL;DR
A rotating acrylic standee is a 6 cm laser die-cut figure panel on a ball-bearing base that spins 360°. At miniature scale with double-sided sandwich lamination, the decisions that matter most are transparent-background file prep, strict CMYK colour mode, and keeping fine details safely inside the silhouette edge. Open this product in Popecho's onsite editor, let the die-cut outline and safe-zone overlay load, and proof your CMYK file before submitting — those three steps prevent the most common print failures.
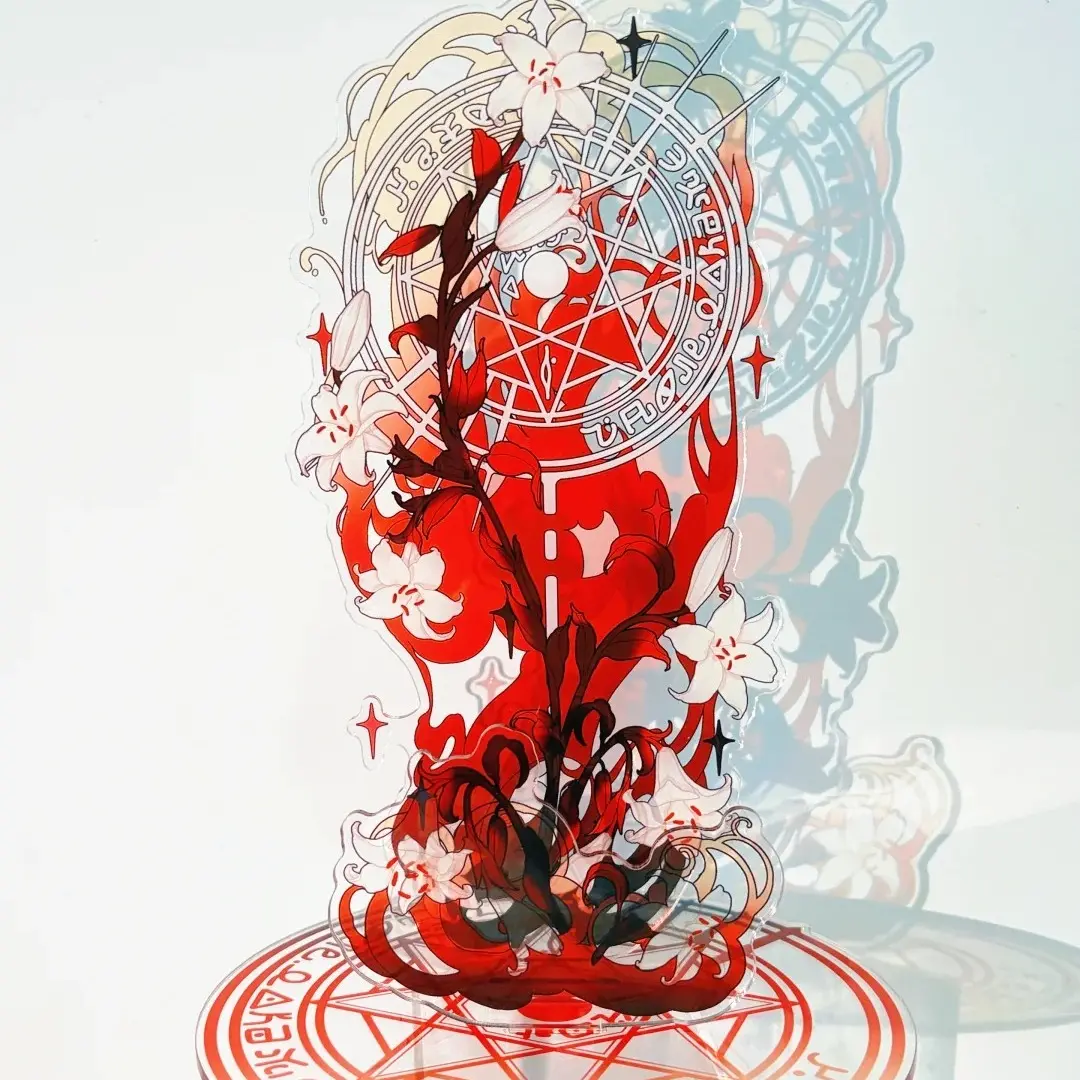
What This Subtype Actually Demands
A rotating acrylic standee is not just a standard standee with a fancier base. The ball-bearing disc mechanism changes how the figure is handled — the panel must be balanced enough to spin cleanly, and because art is visible from every rotational angle, a blank or misregistered reverse side is immediately obvious. The 6 cm height compounds this: at miniature scale, the gap between a safe detail and a trimmed one is only a few millimetres. Chibi and super-deformed proportions dominate this format precisely because they concentrate character identity into bold shapes rather than fine linework. If your design relies on thin strokes, small text, or intricate edge detailing, this is the subtype where those choices cost you most.
Setting Up the Artwork
The figure panel has a fixed height of 6 cm; width follows your character silhouette, so there is no rigid canvas rectangle to match. That freedom is also the trap — designers sometimes build art at screen resolution or in a narrow RGB workspace, then wonder why the output looks flat or why the laser clips detail at the edges.
Start your file in CMYK colour mode before you place a single element. The source is explicit: RGB files cannot guarantee accurate print reproduction, and screen-to-print colour shifts are not treated as defects. Export the figure panel with a fully transparent background so the laser die-cut has a clean silhouette to trace.
Open this product in Popecho's onsite editor and the die-cut outline and safe-zone overlay load automatically for the figure variant. Use them as live guides while composing your art — the safe zone tells you exactly how far from the silhouette edge your face, eyes, and key details need to sit. Because this is a single-surface upload (the base is a fixed hardware component requiring no artwork file), the editor setup is straightforward: place your figure art, confirm it sits within the safe zone, and you are ready to submit.
Surface and Production Decisions
The 3.5 mm high-clarity acrylic reads almost glass-like in hand — light transmits through the panel edges and interacts with any laminate layer you choose. Three options are available: no laminate, aurora (solar) effect, and holographic light-refraction effect. The aurora and holographic laminates bend light into colour shifts as the figure rotates, which is a genuine selling point for a spinner figure. However, the shimmer intensity varies significantly with viewing angle and light source. Dark or heavily saturated art shows the strongest contrast against the laminate shimmer; pale or desaturated designs can lose definition.
Double-sided sandwich lamination means art is printed on both faces with a protective interlayer — scratching is resisted, and the reverse is legible, not blank. The tradeoff is that colour cannot be corrected after lamination. Whatever CMYK values you submit are what get sandwiched permanently. This is why CMYK proofing before upload is not optional on this product. The clear substrate also shifts perceived saturation slightly compared with a monitor preview; colours often read more vivid under direct light, especially with a holographic laminate active.
Laser die-cutting produces polished side edges and a mild acrylic odour during production — both are normal and noted in the product source. The odour dissipates; the polished edges are a finish advantage.
What Trips Creators Up
Submitting an RGB file. The most common and most avoidable mistake. CMYK is mandatory; RGB is not flagged as an error at upload but produces unpredictable colour shifts once printed. Convert first, proof second, then upload.
Detail too close to the silhouette edge. At 6 cm, the laser traces your uploaded outline precisely. Any line, text, or fine detail sitting at the outermost edge of the silhouette risks being cut away. Use Popecho's editor safe-zone overlay as the hard boundary, not a rough estimate.
Designing fine linework at this scale. Text below approximately 4 pt and lines thinner than 0.5 pt will not resolve cleanly after laser cutting at 6 cm. Build your canvas larger, design at full detail, then scale down — and check that surviving details remain inside the safe zone after scaling.
Expecting laminate shimmer to be uniform. The aurora and holographic effects look different in every photo because the effect is angle-dependent. If your product listing or campaign imagery needs to show the shimmer clearly, plan your photography under direct or angled light rather than flat overhead lighting.