Custom Printed Umbrella: Panel Seams and Print Face Setup
Custom Printed Umbrella: Panel Seams and Print Face Setup
How an 8-panel radial surface and inside-vs-outside print choice shape every artwork decision.
TL;DR
A custom printed umbrella is not flat merch — it is an 8-panel radial canopy where rib seams, a curved surface, and a binary print-face choice each redirect your artwork before production starts. The decision that matters most is inside versus outside print: inside canopies transmit light and wash out colour, so saturation must be deliberately boosted at the file stage. Open the product in Popecho's editor to load the correct panel die-cut outline for your variant, then build from there.
What This Subtype Actually Demands
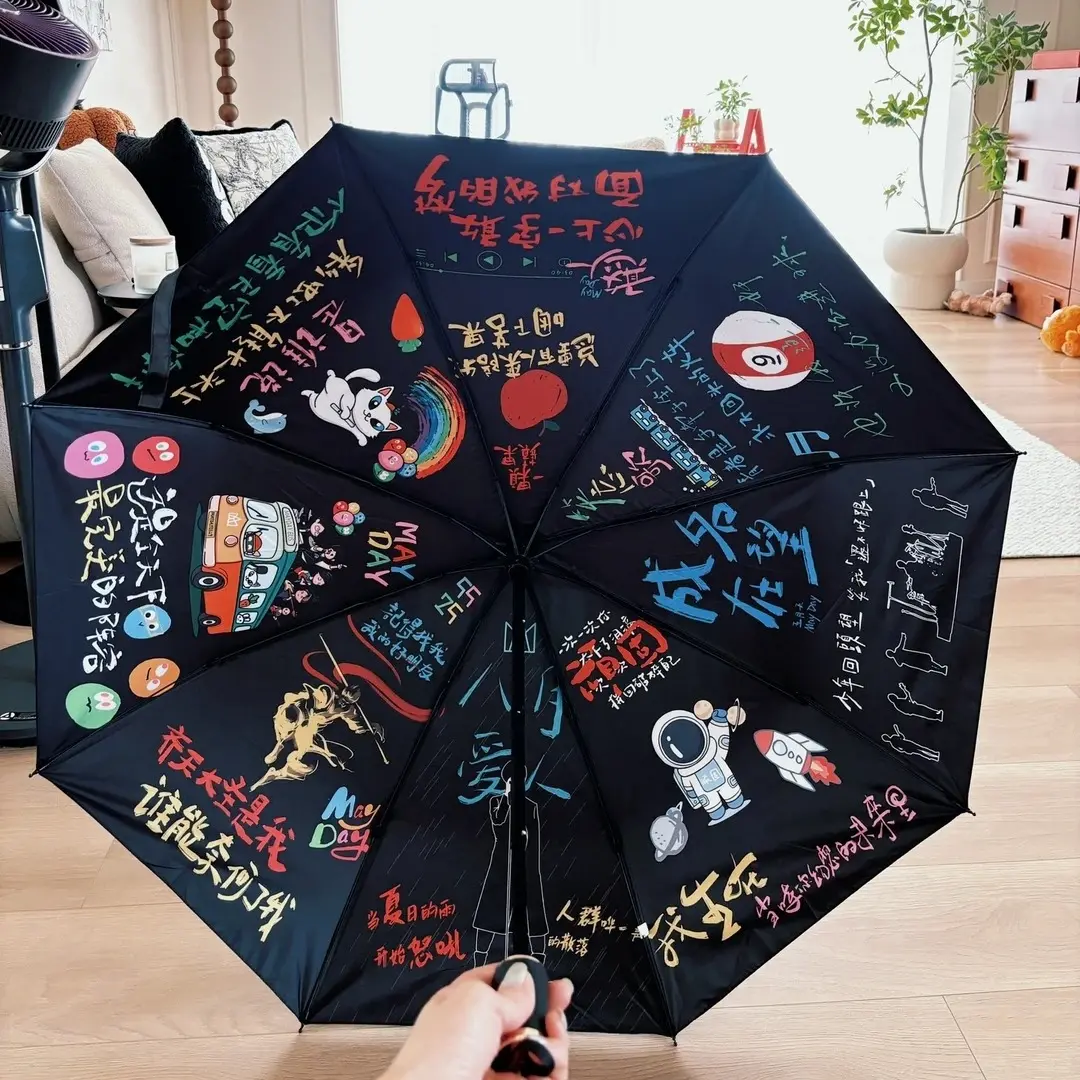
A printed umbrella is one of the few merch forms where the substrate is a three-dimensional, radially segmented surface — not a flat rectangle you can mirror-check on screen. The 8 canopy panels are separated by physical ribs, which means any design element crossing a seam line will be split, obscured, and possibly cut off at the rib. That structural reality shapes every layout decision before you touch colour or resolution.
Adding to that, the print-face choice — inside canopy or outside canopy — is locked at order time and changes how your artwork reads in the real world. An inside-print canopy shows the design to the person holding the umbrella, but sunlight bleeds through the fabric from outside, making all colours appear lighter and semi-transparent to a bystander. Outside print reverses that: bold from above, invisible from underneath. Neither is correctable after production begins.
The 6k capsule variant adds a further decision: it uses different canvas dimensions from the standard 130 cm umbrella and is manual-open only, so there is no auto-open hub clearance issue — but the panel proportions change, and confusing the two canvases is one of the most common file errors on this product.
Setting Up the Artwork
Canvas size is variant-specific. The standard sun-rain umbrella uses a full canvas of approximately 130 × 130 cm at 300 DPI; the 6k capsule uses approximately 120 × 120 cm at the same resolution. A single panel on the standard form is roughly 22 × 31 cm; on the capsule it is roughly 22 × 22 cm. Working at the wrong canvas size means your art will scale incorrectly across panels.
Open the product in Popecho's editor and the correct 8-panel die-cut outline loads for your chosen variant. The bleed boundary appears as a live guide — add 3 mm of bleed on every panel edge, and keep all critical art and text at least 3 mm inside each edge. The editor also surfaces the rib seam positions, which is the only reliable way to confirm your clearance before submitting.
For the auto-open standard variant, the editor die-cut outline includes the apex clearance zone — a small transparent hub sits at the canopy tip on auto-open models, and any logo or face centred there will be partially obscured. Manual-open and capsule variants do not carry this constraint.
If you are planning a composite full-canopy layout where the design reads as one image across all 8 panels, extend art 1–2 mm past each seam line into the overlap zone. Ribs create a visible gap in the finished canopy; designing with deliberate seam overlap prevents blank gaps at the rib lines. RGB colour mode is required. Files must be PNG or JPG, maximum 6 MB per file.
Surface and Production Decisions
Popecho prints the canopy using digital dye-sublimation, which reproduces gradients and photographic detail well across the polyester canopy fabric. The material constraint is light transmission: polyester is not opaque, and inside-print designs will always read lighter from the exterior than they appear on screen. The practical fix is to increase saturation across your artwork before upload — aim for richer, higher-contrast colour blocks rather than pastel or low-saturation palettes on inside-print orders.
Colour mode is the other hard surface constraint. CMYK files submitted to a dye-sublimation workflow produce severely faded, colour-shifted output — Popecho's own file-prep documentation shows side-by-side comparisons of CMYK versus RGB uploads on finished canopies, and the difference is significant. Convert all files to RGB before upload; do not assume the system will convert automatically.
Outside-print designs avoid the light-transmission washout issue entirely, but the polyester texture is visible on the outer surface, which affects how fine details and thin linework read at canopy scale. Bold, high-contrast artwork performs better than small detail on either print face.
For the optional custom sleeve add-on, the sleeve is a separate print surface with its own canvas dimensions. Open the sleeve product separately in Popecho's editor to get the correct template — do not reuse the canopy canvas for sleeve artwork.
Popecho produces custom umbrellas with a 10-day production lead time, and the MOQ is 1 unit, which makes a single-unit sample run a practical pre-production step before committing to a full run.
What Trips Creators Up
Artwork placed across a rib seam gets split. The umbrella ribs are physical hardware, not a print boundary — anything centred on a seam line will be cut by the rib in the finished product. Load the die-cut outline in Popecho's editor and keep characters, faces, and key text fully within one panel, or plan the seam overlap deliberately.
Inside print looks washed out. Colours that look vibrant on screen will appear lighter when the canopy transmits light. Boost saturation before upload — do not wait until you receive the finished sample to discover the shift.
CMYK files cause faded, muted output. This is the most documented failure mode on this product. Submit RGB only. If your source file is CMYK, convert in your design application before exporting.
Wrong canvas dimensions for the capsule variant. The 6k capsule has different panel proportions from the standard umbrella. Selecting the correct variant in Popecho's editor before starting layout is the only reliable way to work at the right canvas size.