Rectangular Pin Badge: White Ink and Base Control
Rectangular Pin Badge: White Ink and Base Control
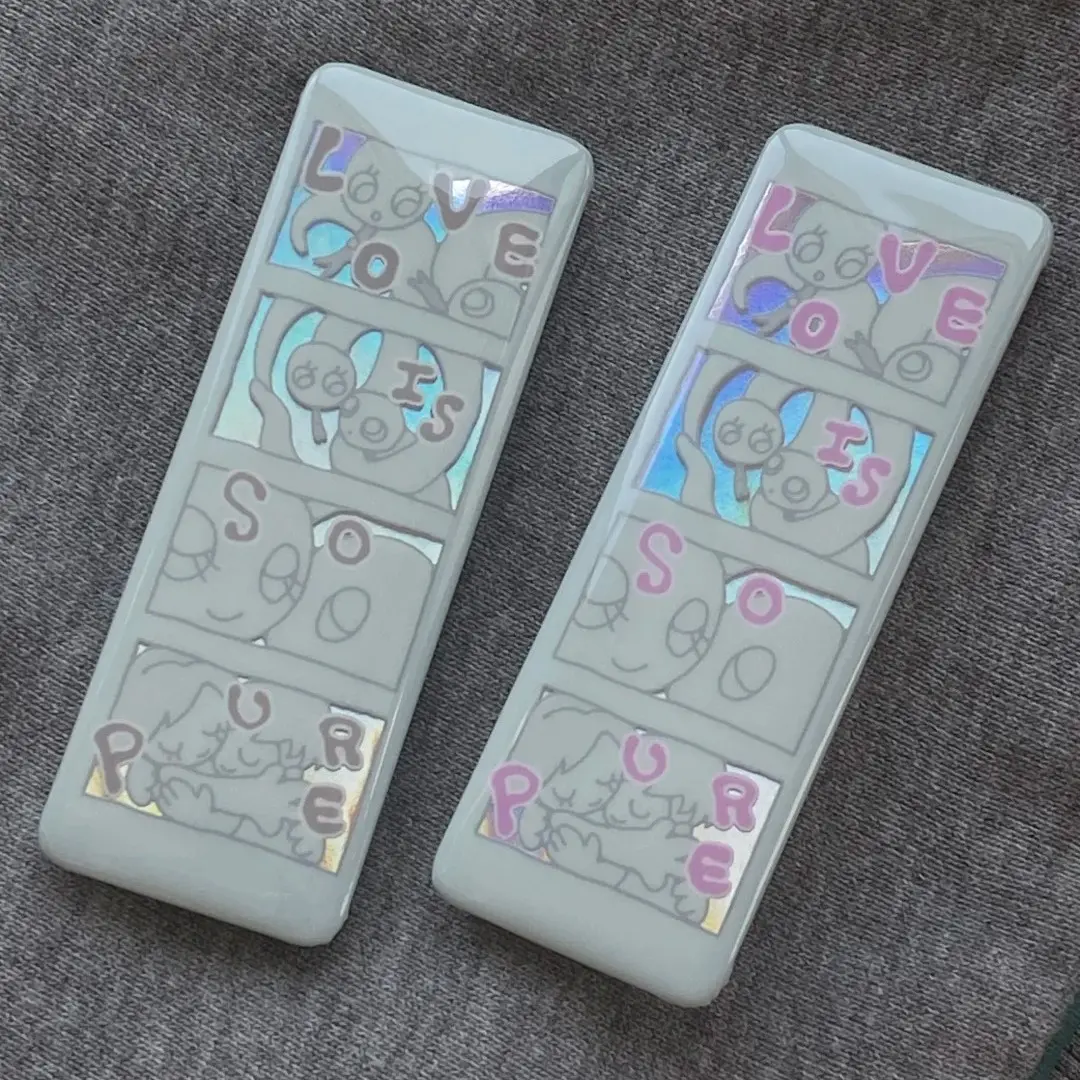
How the holographic base and white-ink layer interact on an 85×30mm strip badge.
TL;DR
The 85×30mm holographic glitter pin badge is a landscape-format UV-printed badge where a shimmering base layer sits beneath your art. The single most consequential decision is not the artwork itself — it is the white-ink mask that controls exactly how much of that base shows through. Open the product in Popecho's onsite editor, check the white-ink layer preview against your chosen base pattern, and resolve coverage before you submit.
What This Subtype Actually Demands
Most pin badges forgive you for thinking only about what you draw. This format asks you to also think about what you reveal. The 85×30mm strip badge sits on a holographic or glitter base — one of 40+ patterns — and that base is always there, always shining. Your UV-printed art layer and its underlying white-ink mask together determine how much of that shimmer reaches the eye.
The landscape orientation adds a second constraint. At nearly three times wide as it is tall, the format strongly rewards horizontal compositions: cropped eye-zone art, nameplate layouts, banner-style character strips. Symmetric placement matters more here than on a square or circular badge — off-center art or drifting text reads as a mistake immediately at this aspect ratio. Every design decision should account for both the shimmer beneath and the panoramic frame around it.
Setting Up the Artwork
Your total canvas is 91×36mm — the 85×30mm finished cut plus 3mm of bleed on every side. Set your document to 300 DPI in RGB mode. Keep all critical art and text at least 3mm inside the finished cut line; Popecho's die-cut tolerance is approximately 1mm, so nothing essential should sit within 1mm of the edge.
Open the product in Popecho's onsite editor and the bleed boundary, safe-zone overlay, and die-cut outline load automatically. Use those live guides throughout your session rather than estimating by eye. The editor also carries a template catalog with 40 starting points matched to the available base patterns, so you can begin from a canvas that is already sized and zoned correctly.
The white-ink layer is a separate channel inside the editor, not a layer you add afterward in outside software. Popecho's editor surfaces a white-layer toggle so you can preview exactly which areas will print opaque and which will let the base through. Trim the white layer 1mm inside the die line near any dark or solid-color edges — if you leave white ink at full bleed against a dark silhouette, a hard pale halo appears on the finished badge.
Surface and Production Decisions
Seven-color UV printing delivers a wide gamut that handles saturated anime palettes, vivid skin tones, and glowing-eye color work well. Keep your file in RGB throughout — CMYK conversion shifts hues unpredictably under UV curing. Fine lines thinner than 0.3mm and low-contrast gradients adjacent to white-covered areas may lose detail during the UV process; thicken strokes and push contrast where precision matters.
Base pattern selection is a real design decision, not an afterthought. High-reflectance patterns like rainbow laser or flame laser can overpower light-colored art — the shimmer competes with the print rather than complementing it. Subtle bases like pearl white or white porcelain stay behind pastel and line-art styles. Silver glitter is highly reflective and can make printed art appear washed out — this outcome is treated as a design-side result rather than a production defect, so it will not be covered under quality claims. Select your base inside Popecho's editor to see the combined mockup before committing.
The PET anti-scratch laminate bonds to the front face and adds surface durability. It also adds a slight sheen, so watercolor or matte-textured art will read slightly glossier on the physical badge than on screen. Minor specular micro-marks on the laminate are inherent to the material and fall outside quality claim scope — the same caveat applies here as with mirror-polish small-card surfaces.
What Trips Creators Up
White-layer silhouette halo. When the white base is not trimmed near a character outline, a pale ghost edge appears around the figure on the finished badge. Pull the white layer 1mm inside the die line at all dark-edge boundaries.
Choosing a high-reflectance base for light art. Rainbow or flame laser patterns were built for bold, saturated designs. Dropping a pastel illustration over them produces a washed-out result — and since the base choice is the creator's call, Popecho's quality claim does not apply. Preview the pairing in the editor before ordering.
Ignoring the horizontal axis when placing elements. Asymmetric art that looks balanced in a square canvas can read as visibly skewed across the 85mm span. Verify alignment against the safe-zone guides in Popecho's editor at actual badge proportions.
Submitting CMYK artwork. UV printing reads RGB. A file converted from CMYK mid-workflow can arrive with shifted hues — especially in skin tones and saturated mid-tones. Keep the color mode set to RGB from canvas creation through export.