Acrylic Puzzle File Setup: Sandwich Construction Logic
Acrylic Puzzle File Setup: Sandwich Construction Logic
How the double-layer clamp assembly changes every artwork decision you make.
TL;DR
A custom acrylic puzzle from Popecho is a printed jigsaw permanently sandwiched between two clear acrylic sheets — not a flat print. That construction means your artwork must work with piece-seam lines crossing it, your canvas must extend to a full 150×200 mm outer boundary, and your color mode must be CMYK before upload. Open your design in Popecho's onsite editor, confirm the bleed boundary and safe zone appear, then build outward from there.
What This Subtype Actually Demands
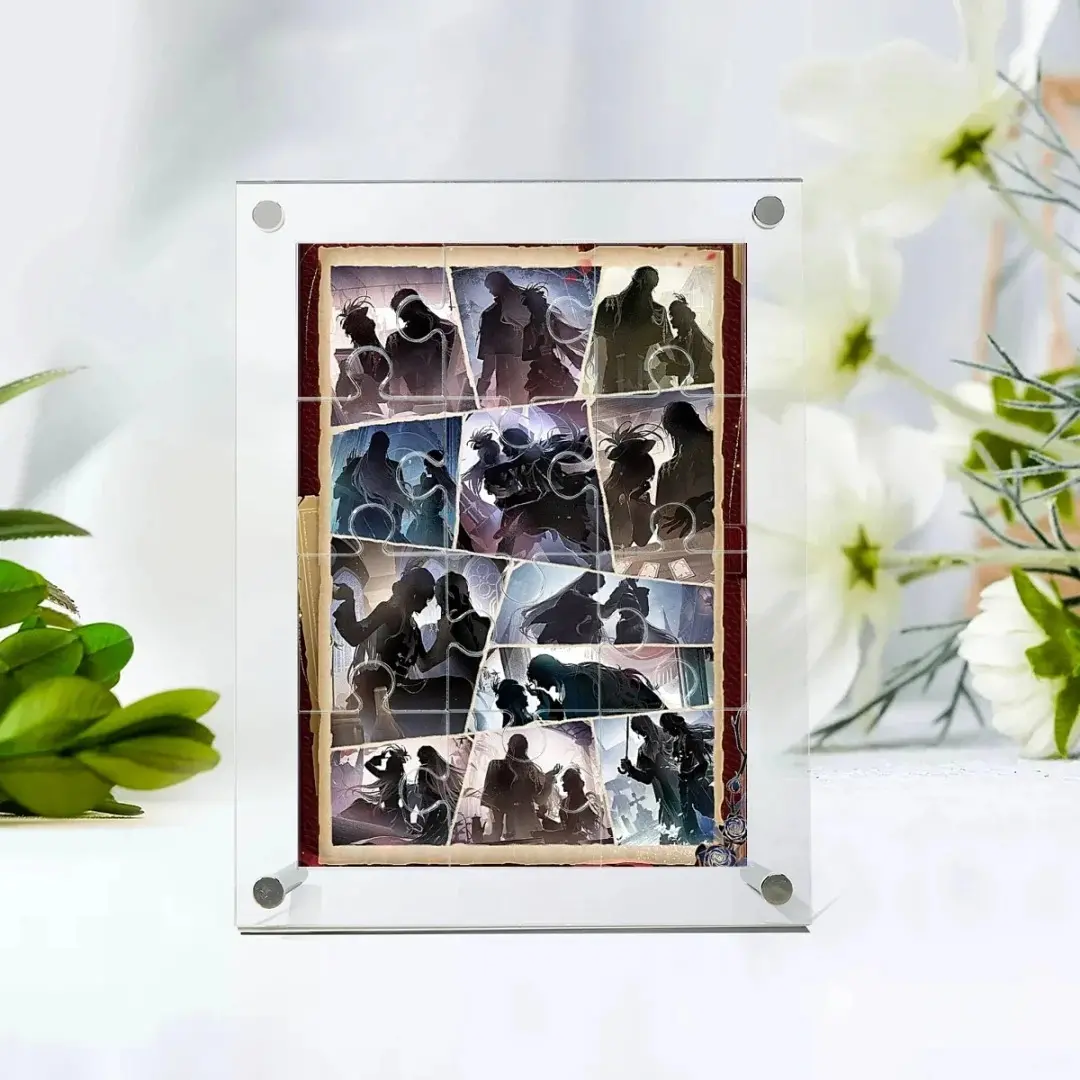
Most acrylic merch asks you to design for a flat, static surface. An acrylic puzzle asks something different: the artwork is cut into interlocking jigsaw pieces, then reassembled and locked between a 2.5 mm front sheet and a 2.5 mm back sheet with screws. That sandwich is the finished product. There is no loose paper insert, no separate frame — the printed puzzle layer is permanently enclosed.
That reality produces two design constraints you will not run into with standees or charms. First, your artwork will be visually interrupted by piece seam lines, so dense fine-line detail that depends on pixel-perfect continuity across the full image tends to break poorly at the cuts. Second, the outer 2.5 mm on every side disappears into the clamp layer, so nothing important can live in that margin. The included 6 cm pen stand means the finished piece will sit upright on a desk — so portrait or upright landscape compositions read better in-situ than horizontal panoramas.
Setting Up the Artwork
The canvas size for the 12×17 cm variant is 150×200 mm — this is the full outer frame boundary, not the puzzle image area. The active print area is 100×150 mm. That gap is your bleed: 2.5 mm on each side, which is exactly the thickness of the front acrylic clamp layer.
Open the product in Popecho's onsite editor and the bleed boundary and safe-zone overlay load automatically for the variant you select. Work inside those live guides rather than trying to estimate margins by hand — the editor shows you exactly where the clamp line falls and where the cut area begins.
CMYK color mode is non-negotiable. Popecho's production process is direct CMYK print, and screen color (RGB or HSL values previewed on a phone or monitor) will not translate accurately to the printed layer. Convert to CMYK before you upload, not after. If your software renders pastels or neon values that look vivid on screen, check them in a CMYK simulation first — the acrylic backing can wash out light tones that appear solid in an RGB preview.
Full-bleed artwork is strongly recommended. Because the printed layer is fully enclosed by the sandwich assembly, any unfilled area near the canvas boundary risks a visible gap at the frame edge on the finished unit.
Surface and Production Decisions
High-transparency acrylic is the only material here — every layer from front to back is clear. That clarity is the feature: the printed layer reads vividly because it has no tinted substrate muting it. The tradeoff is that clear acrylic makes everything on the surface legible, including fingerprints, micro-scratches, and any dust that settles between layers during assembly. Minor surface imperfections are a known characteristic of the material; Popecho's after-sales policy explicitly excludes them from quality claims, and the product page notes this directly for perfectionists before they order.
Laser cutting produces the puzzle piece shapes. Laser-cut acrylic edges will carry a visible protective film and may have a faint smell — both are normal production characteristics, not defects. If you are handling samples to evaluate before a larger run (MOQ is 1 unit, so a single proof order is always possible), peel the film and let the piece air briefly before evaluating edge quality.
Color saturation in your source file directly controls perceived brightness in the finished puzzle because print goes directly onto the puzzle substrate. Avoid very light or low-contrast artwork without proofing — the clear acrylic amplifies vibrancy, but it cannot compensate for a design that is genuinely too pale in CMYK values.
Popecho produces this product in 8 days.
What Trips Creators Up
Designing for a flat read, not a cut one. Artwork with a single focal element centered on a plain background often looks fine broken into puzzle pieces. Artwork with intricate linework, thin text, or edge-to-edge micro-patterns tends to look fragmented at the seam lines. Simplify or chunk your composition so each region still reads as part of the whole.
Uploading RGB and expecting a close match. The color-mode warning is not a formality. Screen previews, especially on phones with high-saturation displays, render colors that direct CMYK print cannot reproduce. Convert before you upload.
Leaving the outer 2.5 mm populated. Faces, logos, and text placed close to the canvas edge get clamped by the frame layer and disappear entirely on the finished unit. If you are composing a character illustration, keep the face well inside the 100×150 mm cut boundary.
Expecting the seam lines to be invisible. Piece cuts cross the image — that is the product. Plan compositions where the seam pattern adds to the tactile appeal rather than bisecting something that needs to be read whole.