Mirror Pin Badge File Setup: Line Art Over a Reflective Base
Mirror Pin Badge File Setup: Line Art Over a Reflective Base
Why your artwork choice and mirror color are one decision, not two.
TL;DR
Mirror pin badges from Popecho are laser-engraved onto 304 stainless steel in a high-gloss mirror finish — the design burns into the reflective surface as high-contrast line art, while un-engraved areas stay as your chosen base color. Because the process reads artwork as engraved versus not-engraved, full-color illustration and photographic gradients are not compatible. Prepare solid, high-contrast line art at 300 DPI, choose your mirror base color as a deliberate design element, and open the product in Popecho's onsite editor to confirm your safe zone before uploading.
What This Subtype Actually Demands
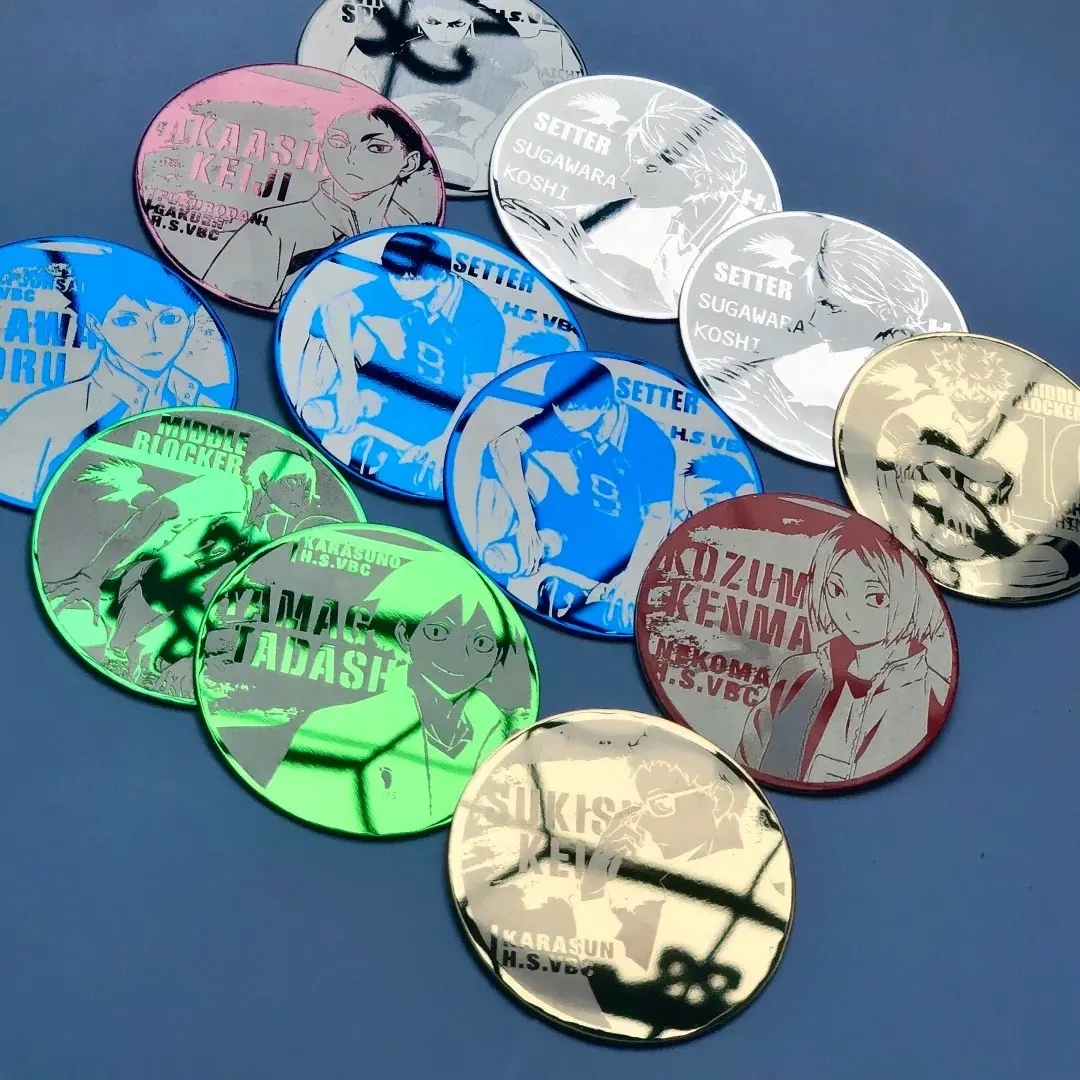
Mirror pin badges operate on a fundamentally different logic from printed button badges. There is no ink layer, no domed cover, no full-color print beneath a clear finish. Instead, a precision laser removes the lacquer coating from a 304 stainless steel mirror surface wherever your artwork sits — engraved areas expose the bright steel beneath, un-engraved areas remain as the mirror base color you selected. The result is a two-tone reflective piece, not a full-color illustration.
That constraint shapes every decision that follows. Your artwork must be composed entirely of solid lines and filled shapes — the laser either fires at a spot or it doesn't. Fine lines below roughly 0.3 mm may not resolve cleanly. And the mirror base color isn't a background choice you make after finishing your art: it is part of the visual composition from the first sketch.
Setting Up the Artwork
Each shape variant has its own bleed canvas. The finished sizes are oval 45×70 mm, rectangle 20×70 mm, circle 58×58 mm, and square 55×55 mm. Add 2 mm bleed on all sides, which brings the working canvases to oval 54×54 mm, rectangle 31×91 mm, circle 63×63 mm, and square 60×60 mm. Work at 300 DPI in RGB color mode. Accepted formats are PNG, JPG, and PSD; keep the file under 2 MB.
When you open the Mirror Pin Badge product in Popecho's onsite editor, the die-cut outline and safe-zone overlay load automatically for whichever shape variant you select — you do not need to construct the guide geometry yourself. The editor's live safe-zone marker shows the 2 mm inset boundary; keep all critical line art inside that line. Elements that cross into the bleed zone will be trimmed at production.
Because the design reads as engraved versus mirror, artwork density matters more than color. A portrait that relies on skin-tone gradation will not translate — the same subject redrawn as clean, bold outlines will. Think of your file less as a colored illustration and more as a stamp or a seal design: high contrast, solid fills, deliberate negative space that lets the mirror color speak.
Surface and Production Decisions
Popecho uses imported step-light laser engraving equipment for this product — that technology produces sharp edges with no yellowing and no burring on the engraved boundary. The sharpness you get on final product is directly proportional to the sharpness of your source file: vector-quality art or raster at full 300 DPI is the baseline expectation.
The mirror base color is fixed at order time. Seven options are available — black, gold, silver, blue, green, purple, and rose gold — and you cannot blend or mix them. This matters because the same line-art file produces dramatically different results across bases: bold outlines on black read as bright steel against darkness; the same outlines on gold read as matte-steel marks against warm shimmer. Plan the base color before finalizing your artwork, not after.
One material reality to communicate to anyone receiving these badges: minor surface micro-scratches on the mirror face are an inherent characteristic of the high-gloss steel substrate. Popecho explicitly notes these are outside the after-sales quality scope — they are not a production defect, they are the physics of a mirror finish. Set that expectation with your end customers at the point of sale.
What Trips Creators Up
Submitting full-color illustration files. The laser process is binary — engraved or not. Gradients, soft shadows, and photographic tones do not translate and will produce unpredictable or washed-out engraving. Convert your artwork to solid line art before uploading.
Treating the base color as an afterthought. The mirror base is your background. Choosing it after the artwork is done often means the contrast logic doesn't work. Lock in the base color at the concept stage alongside your line-art composition.
Placing key art inside the bleed zone. The 2 mm boundary around each finished size is a cut margin. Popecho's editor shows this as a live overlay — use it. Any line or fill that crosses the safe zone on screen will be trimmed on the physical badge.
Uploading blurry or oversized files. Files that are low-resolution, exceed 2 MB, or arrive in an unsupported format are flagged before production — and poor-quality source files that do pass through will produce weak engraving contrast that is not covered under after-sales. Check resolution, format, and file size in the editor before you submit.