Mini Picket Fan File Setup: Round Crop and Double-Sided Alignment
Mini Picket Fan File Setup: Round Crop and Double-Sided Alignment
What the 97mm circle, 2mm bleed, and front/back role split actually require from your artwork.
TL;DR
A custom mini picket fan prints on a 97×97mm round face — small enough that thin artwork disappears and tight crops punish careless placement. The decisions that matter most are filling the full bleed, keeping critical elements 3mm inside the finished circle, and treating the front and back as intentionally distinct compositions rather than mirrors. Open the product in Popecho's onsite editor and the die-cut circle, bleed boundary, and safe-zone overlay are already loaded — that's the fastest way to proof both sides before submitting.
What This Subtype Actually Demands
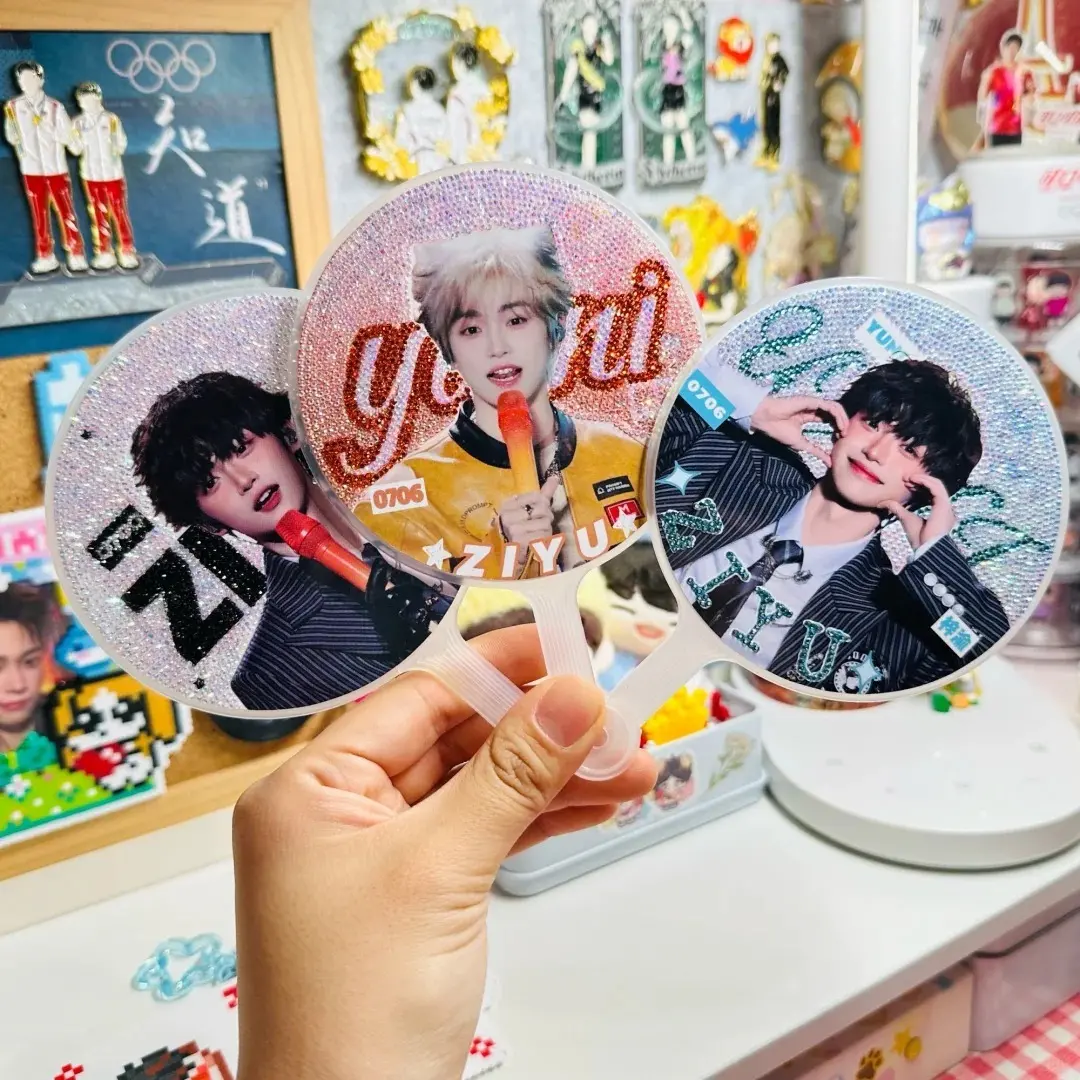
A 97×97mm round fan face is noticeably smaller than a standard hand fan. At that size, the merch shifts function entirely: it becomes a collectible, a bag charm, or an idol-support item rather than a cooling tool. That shift has a direct design consequence — artwork that reads well on a 200mm fan can disappear or feel cluttered at this scale.
Bold, high-contrast compositions work best here. A single strong character face, a clean logo lockup, or a two-colour graphic with clear negative space will hold at arm's length. Fine line-art, small supporting text, and multi-element collages tend to muddy together once the fan is in someone's hand. The round crop tightens that constraint further: corners don't exist, so anything valuable sitting in a square layout's corner is already gone.
Both faces receive a full-colour print, and both get crystal gloss lamination — so both sides are equally visible and equally permanent once production runs.
Setting Up the Artwork
The working canvas is 101×101mm, which gives you the 97×97mm finished circle plus 2mm bleed on all four sides. At 300 DPI that works out to roughly 1193×1193 px. Submit PNG or JPG, one file per side, each under 3 MB.
Popecho's onsite editor loads the die-cut circle outline and bleed boundary for this variant automatically when you open the product. The safe-zone overlay snaps to the 97mm finished circle so you can see, before submitting, exactly which area is at risk of trimming. There is no separate template to locate or download — the guides are live inside the editor as you place your art.
Because has_double_view is active, the editor gives you a dedicated canvas for the front surface and a second canvas for the back. Use that split intentionally: front and back don't need to be the same composition. A common approach is a character illustration on the front and a clean text or logo treatment on the back. The template catalog inside the editor includes four starting layouts — browsing those before building from scratch often saves a full setup pass.
Color mode must be RGB throughout. Do not export CMYK; the conversion will shift your colours unpredictably.
Surface and Production Decisions
Crystal gloss laminate covers both faces. The finish intensifies perceived saturation and sharpness, which is generally a benefit — but it also amplifies any resolution problem that was already in the file. Art submitted at under 300 DPI will print softly, and the high-gloss surface makes that softness more obvious than a matte finish would. Submit crisp files.
The construction is sticker-based: two printed and laminated stickers are adhered manually to the PP fan body, one per face. Manual application means front-to-back rotational registration is not guaranteed to be perfect. This is a documented characteristic of the process, not a defect — design both sides so a few degrees of rotation between them does not break the composition.
The PP handle ships in white or black. Choose the handle colour before finalising your artwork; a white handle reads differently against a light-background front design than a black handle does. The handle also has a small hanging hole at the base — useful context if you plan to position any design element near the lower edge of the fan face.
A thin protective film covers the laminate during shipping. Peel it off before displaying or photographing the fan; this is easy to miss on first unboxing.
What Trips Creators Up
Placing key elements too close to the circle edge. The finished cut is 97mm, but anything within 3mm of that circle is in the trim risk zone. Text, faces, and icon borders all need to sit at least 3mm inside the cut line. Popecho's safe-zone overlay shows this boundary live — check it before you finalize.
Leaving a white canvas edge unfilled. Any uncovered area at the canvas boundary prints as a visible white strip around the finished fan. Fill the full 101×101mm canvas with art or a background colour field, all the way to the edge.
Submitting CMYK files. Neon tones and very light colours (value below roughly 20%) already reproduce more muted in print. CMYK conversion on top of that compounds the shift. Convert to RGB before uploading — if your design app exports CMYK by default, use its colour-mode or image-adjust setting to switch before saving the final file.
Treating front and back as identical. Because alignment between the two sides is manual, a composition that depends on precise front-to-back registration will look misaligned in hand. Design each side as a self-contained piece, and let the double-view setup in Popecho's editor confirm that both work independently.