Photocard Binder Cover File Setup: Bleed and Finish
Photocard Binder Cover File Setup: Bleed and Finish
Why the 18 mm bleed and laminate choice must be locked before you finalise art.
TL;DR
A custom photocard binder from Popecho prints your artwork on a steel-board cover in full 7-color HD, then bonds it permanently under matte or glitter laminate — so both the laminate variant and every pixel of your canvas need to be decided before upload. The single most consequential step is extending your background art to the full 436 × 266 mm canvas edge; any gap prints as a visible stripe on the finished product. Open the product in Popecho's onsite editor and set your laminate choice first, then build the cover.
What This Subtype Actually Demands
A photocard binder is a cover product, not a printed-page product. Your artwork appears on the outer cover only — front, back, and spine panel — while the inner PP pocket pages are a transparent standard accessory that holds photocards but carries no print. That distinction matters when you are budgeting design effort: every creative decision lands on a single printed surface bonded to a steel-board core.
Because the laminate layer is heat-bonded to the print at production time, the finish you select — matte or glitter/gypsophila — cannot be changed after the file is submitted. Both options alter perceived color: glitter shifts the reading of mid-tones slightly warm; matte deepens shadows. Choosing the wrong variant means reprinting, not adjusting.
The 4-pocket grid interior is sized to hold standard 55 × 85 mm photocards snugly in double-sided visible pockets — a strong selling point for K-pop and idol-adjacent projects where fans want both faces of each card visible without removing it.
Setting Up the Artwork
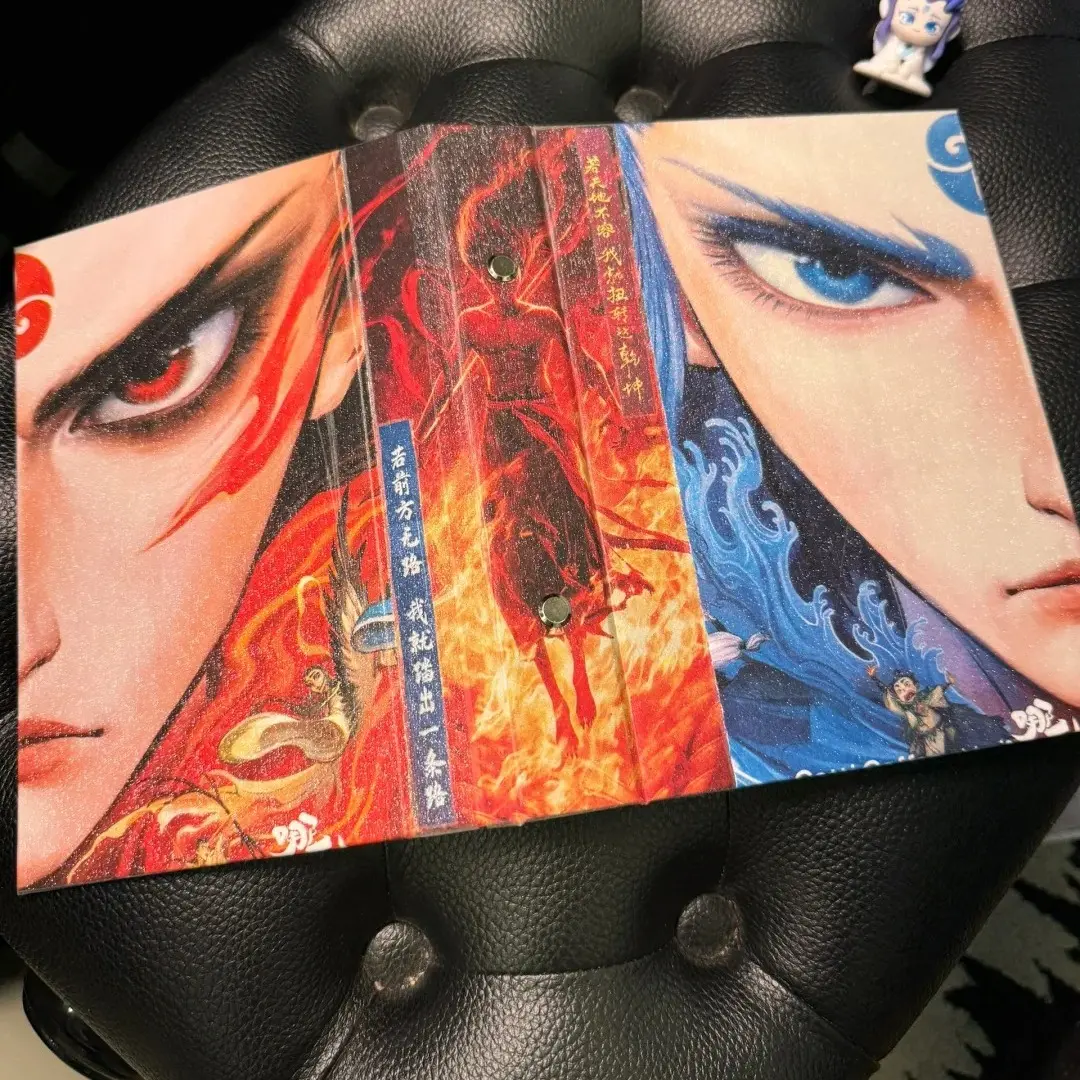
The cover canvas is 436 × 266 mm total. The finished cut lands at 182 × 230 mm, with 18 mm of bleed on every edge. That bleed is not a thin safety strip — it is a full 18 mm on each side, which means your background art must fill the entire 436 × 266 mm canvas with no white margins, no color blocks, and no bare canvas at any edge.
Popecho's onsite editor loads the correct canvas dimensions and safe-zone overlay for this product automatically. One template is available in the catalog as a starting point — open it to see the cut boundary and the 18 mm safe-zone perimeter already marked. Keep all text and key art at least 18 mm inside the cut line; the editor's overlay marks this boundary visually so you can check placement before committing.
File requirements: PNG or JPG, 300 DPI, RGB color mode, 15 MB maximum. Submit in RGB — CMYK files are converted automatically during processing, and that conversion consistently produces oversaturation that differs from your screen preview. Check your laminate variant selection inside the editor before uploading, because that choice is locked at order time.
Surface and Production Decisions
Popecho prints the cover using an indigo 7-color HD process that handles a wide tonal range well in standard RGB art. Where it has real limits: fluorescent and neon tones, and any color area with a brightness value below roughly 20%, will not reproduce faithfully. The output gap between screen and finished product is most visible on glitter-laminate orders where the base texture interacts with very dark or very saturated areas. This color-accuracy gap is explicitly outside the after-sales warranty scope, so proofing with realistic expectations matters more here than it does on a flat matte surface.
Matte laminate is the safer choice for color-critical art — it darkens slightly but behaves predictably. Glitter laminate rewards bold, high-contrast designs where the texture adds to the effect rather than complicating a delicate color read. Neither finish accepts white-ink or gilding layers on this product; the printed surface is the finished surface.
Production runs 10 days from confirmed artwork. MOQ is 1 unit, so a single-unit proof before a larger run is straightforward.
What Trips Creators Up
Background art stops short of the canvas edge. The steel-board color shows through anywhere the print does not reach. Extend every background element to the full 436 × 266 mm canvas boundary — no exceptions.
White margin added at the image edge. Adding a thin white border or solid block at the canvas edge is the most common upload mistake. That white strip prints exactly as submitted: a visible stripe on the finished cover edge. Remove it before upload.
Key art placed within 18 mm of the cut line. Text, character faces, and logos placed inside the 18 mm safe zone risk being trimmed in the cut step. Use Popecho's editor overlay to verify safe placement before finalising.
Laminate selected after the color palette is locked. Because glitter laminate shifts mid-tones and matte deepens shadows, choosing the finish after finalising the art leads to unexpected output. Select the laminate variant first, then evaluate your color choices under that condition.