
Acrylic Comb File Setup: Two Panels, One Piece
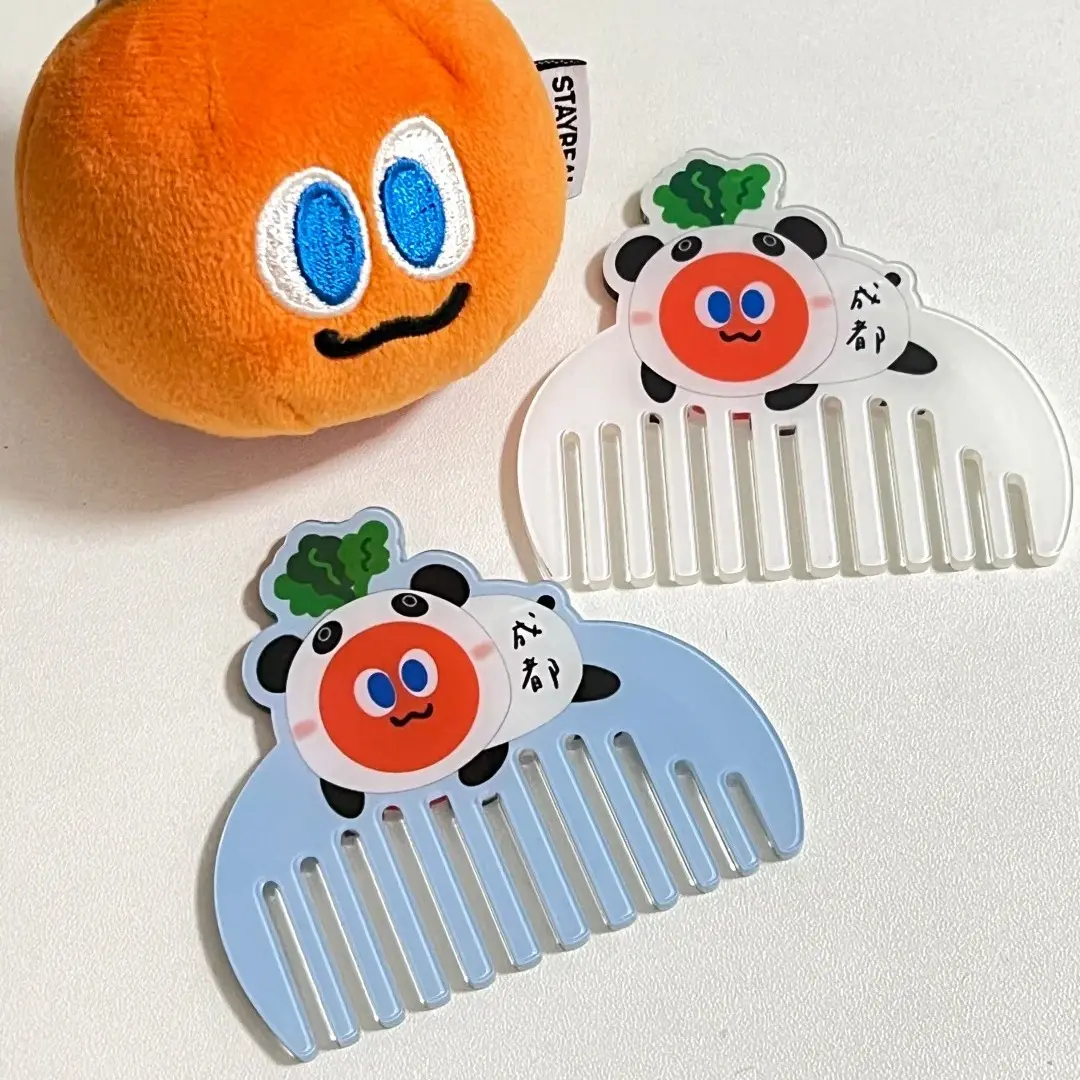
Acrylic Comb File Setup: Two Panels, One Piece
How the upper/lower split and transparent PNG rule control your final result.
TL;DR
Popecho's custom acrylic comb is a CNC-cut three-layer sandwich — 1mm transparent acrylic face, printed film, and 2mm PET backing — finished at 8cm wide. The critical decision is a two-file upload: a transparent-background PNG for the upper character art panel and an opaque file for the lower comb body. Miss the transparency requirement or leave a gap between the two panels, and the piece cannot be produced as a single joined comb. Open the product in Popecho's onsite editor to align both panels against the live die-cut outline before submitting.
What This Subtype Actually Demands
An acrylic comb is a functional object, not a flat display piece. The comb teeth are physically cut from the lower acrylic body by CNC — which means any character art or text you place inside the tooth rows will be cut away in production. That single structural fact shapes every layout decision you make.
The format also splits into two distinct panels: an upper character art zone fixed at 8×5.5cm (character area locked at 4.5cm tall) and a lower comb body at 8×4cm. These two panels must share an overlapping content region or Popecho cannot produce them as one joined piece. Neither panel is optional, and the upper panel size cannot be scaled. Understanding that constraint before you open your design software saves a significant rebuild later.
Setting Up the Artwork
Open the product in Popecho's onsite editor and the die-cut outline, bleed boundary, and safe-zone overlay for this variant load automatically. Use those live guides — do not eyeball the tooth zone or estimate the overlap region.
Canvas dimensions: upper panel at 94.5×65mm (945×650px at 300 DPI), lower panel at 94.5×47.2mm (945×472px at 300 DPI). Bleed is 2mm on all sides; the editor displays this as a live boundary. Work at 300 DPI minimum in RGB color mode.
File format is where most errors enter. The upper character art panel requires a transparent-background PNG — the acrylic face sheet is clear, and the transparency in your file is what allows the substrate to show through the finished comb. An opaque or white-background file for the upper panel produces a solid white block on the finished piece, not the intended see-through effect. The lower comb body accepts JPG or an opaque PNG; the background there is intentional.
Keep all key art and text at least 3mm from the bleed edge, and keep everything clear of the comb-tooth zone. Maximum file size is 2MB per image. Both files must be uploaded, and their content must overlap — the editor's alignment view lets you confirm this before you submit.
Surface and Production Decisions
The high-purity transparent acrylic face sheet transmits more light than standard-grade material, making colors appear richer — especially on light or pastel character art. Very dark or near-black backgrounds reduce this advantage; the clarity benefit is most visible when your upper panel art uses mid-tones and lighter fills.
The sandwich lamination locks the printed film between the acrylic face and the PET backing, so the print layer does not peel or lift under normal use. This also means the layer order is fixed: the acrylic face is always the display side. The 2mm PET backing is the structural base that gives the comb teeth their rigidity — this is not a decorative standee that can be thinned.
Color mode matters for the film print. CMYK files will produce unpredictable saturation and brightness shifts when processed for RGB film output. Every file must be in RGB before upload. Neon, fluorescent, or out-of-gamut hues also fall outside the color-guarantee scope — if your art relies on those values, proof a single unit first. Popecho's production lead time for this product is 8 days, so a single-unit proof (MOQ is 1 piece) adds one cycle before a full run, not weeks.
What Trips Creators Up
White background on the upper panel. The most common mistake. A white-background PNG for the character art blocks the transparent acrylic completely, delivering a white rectangle instead of a floating character. Always export the upper panel with full transparency preserved before upload.
Panels that do not overlap. If the upper and lower files do not share a common content region, the two halves cannot be joined in production. Confirm alignment in Popecho's editor before submitting — the die-cut outline view shows exactly where the panels meet.
Art placed inside the tooth rows. The comb teeth are cut from the acrylic body. Any design element sitting in the tooth zone is physically removed. The editor's safe-zone overlay marks this boundary; trust it.
CMYK file upload. If your preview inside the editor shows unexpected color shifts after upload, the file is almost certainly in CMYK. Correct the color mode in your image editor and re-export before resubmitting — do not adjust and hope the shift corrects in production.