
Plush Coin Purse File Setup: Texture, Bleed, and Color
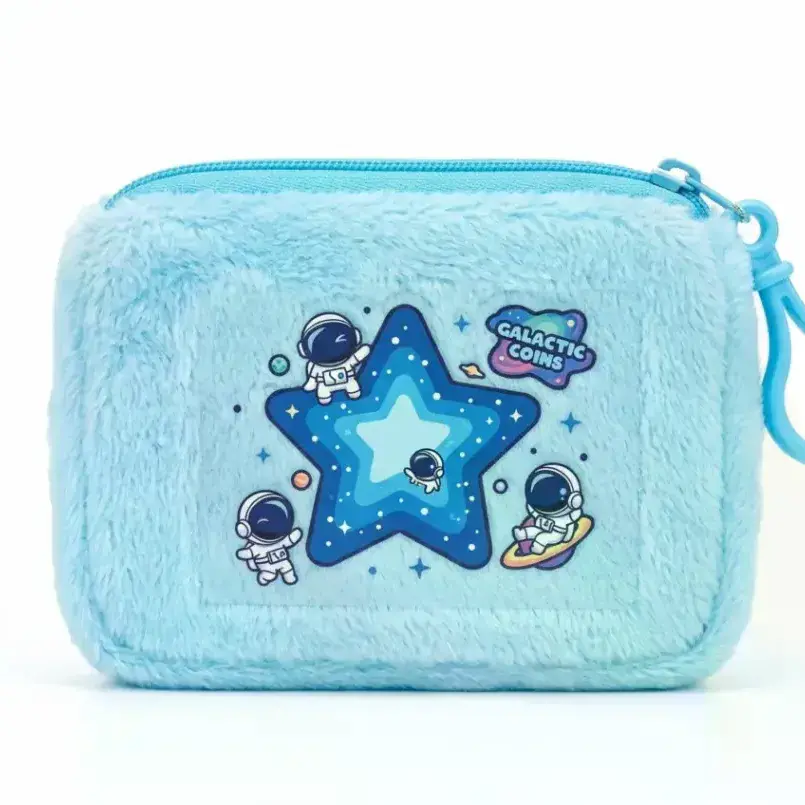
Plush Coin Purse File Setup: Texture, Bleed, and Color
How the plush substrate changes every artwork decision before you upload.
TL;DR
A custom plush coin purse from Popecho is an 85×115mm zipper pouch with a heat-transfer print panel on a plush fabric front — a format where the textile surface actively changes how your artwork reads. The single most important decision is color weight: bold, high-contrast designs survive the plush absorption process; hairline details and neon palettes do not. Open Popecho's editor, pick one of the four available templates, and verify your safe-zone placement before submitting.
What This Subtype Actually Demands
A plush coin purse is not a flat-substrate print job. The moment heat-transfer ink lands on plush pile, two things happen simultaneously: micro-texture from the fabric surface softens fine edges, and the fibers absorb some of the ink load, shifting color away from what your screen showed. These are not defects — they are the substrate's physics. Every artwork and color decision needs to be made with that reality already priced in.
The 85×115mm finished pouch carries a 60×90mm front print area, which sounds small until you realize the carabiner loop turns this into a wearable accessory. A design that looks sharp enough to hang on a bag strap reads differently than one framed behind glass. Bold silhouettes, clean fills, and readable shapes at arm's length are the brief — not intricate linework.
Setting Up the Artwork
Popecho's onsite editor loads the boundary system for this product the moment you open it. The inner red boundary marks the finished 60×90mm print area; the outer red boundary marks the full 62×92mm upload canvas where your 1mm bleed must reach on all four sides. Keep every text element, face crop, and critical detail inside the inner boundary — the bleed margin is for print registration tolerance, not live artwork.
Popecho's editor includes four ready-to-use templates for the plush coin purse, so you can start from a correctly sized canvas rather than building the 62×92mm layout from scratch. Load one, replace the placeholder art, and the boundary overlays stay exactly where they need to be.
File requirements: PNG or JPG, RGB color mode, 300 DPI minimum, 732×1087px at the smaller edge, max 2MB. For character or cutout art, upload a transparent-background PNG. Any transparent region in your artwork will show the plush shell color beneath it — that is intentional behavior, not a rendering error. If you want the panel to read as a self-contained image with no shell color bleeding through, use a solid or white fill behind your artwork instead.
Surface and Production Decisions
The print method here is white-ink plus color heat transfer, which gives the panel its opacity on a colored plush shell. That layered transfer process is what lets a pink-shell purse carry a design without the shell color contaminating the print — the white-ink base acts as a barrier layer.
The consequence: color accuracy on plush is inherently approximate. Screen RGB previews do not translate 1:1 because plush pile absorbs ink differently than a flat coated surface. Popecho recommends converting your artwork to CMYK before uploading as a sanity check on expected output — what looks vivid in CMYK preview is closer to what you will receive.
Neon and fluorescent colors are the highest-risk palette choices on this substrate. Saturation shifts are significant and are explicitly outside after-sale coverage. If your character design leans heavily on electric pinks or lime greens, test with a single unit before committing to a full run. The four shell colors — blue, pink, green, purple — pair best with artwork that has its own tonal contrast rather than relying on maximum saturation to carry the read.
Production lead time is 13 days from order confirmation. MOQ is 1 unit, which means you can proof each shell color as a standalone order.
What Trips Creators Up
Hairline details that vanish on plush. Lines thinner than roughly 0.5mm blur into the pile texture during heat transfer. Character outlines, typography, and decorative borders all need to be drawn heavier than you would for a flat print job. If it looks slightly chunky in the editor, it will look right on fabric.
Transparent PNG misread as a mistake. Transparent areas in your uploaded file show the shell color through the finished print. This is by design — but creators who expected a white background are surprised when pink plush bleeds through open sky areas. Decide intentionally: transparent for a cutout effect, solid fill for a full-frame print.
Neon palette locked in before proofing. Fluorescent colors shift the most in the heat-transfer process and are not covered by after-sale policy. Proof a single unit of any neon-heavy design before producing multiples.
Critical elements too close to the cut edge. Popecho produces to a ±1mm tolerance on all sides. Any artwork detail sitting inside the 1mm bleed margin can shift into the trim. The inner red boundary in the editor is the real safe boundary — treat it as the wall.