Perforated Stamp Sticker File Setup: Working Inward from the Teeth
Perforated Stamp Sticker File Setup: Working Inward from the Teeth
How the serrated border changes your safe zone, bleed logic, and design edge.
TL;DR
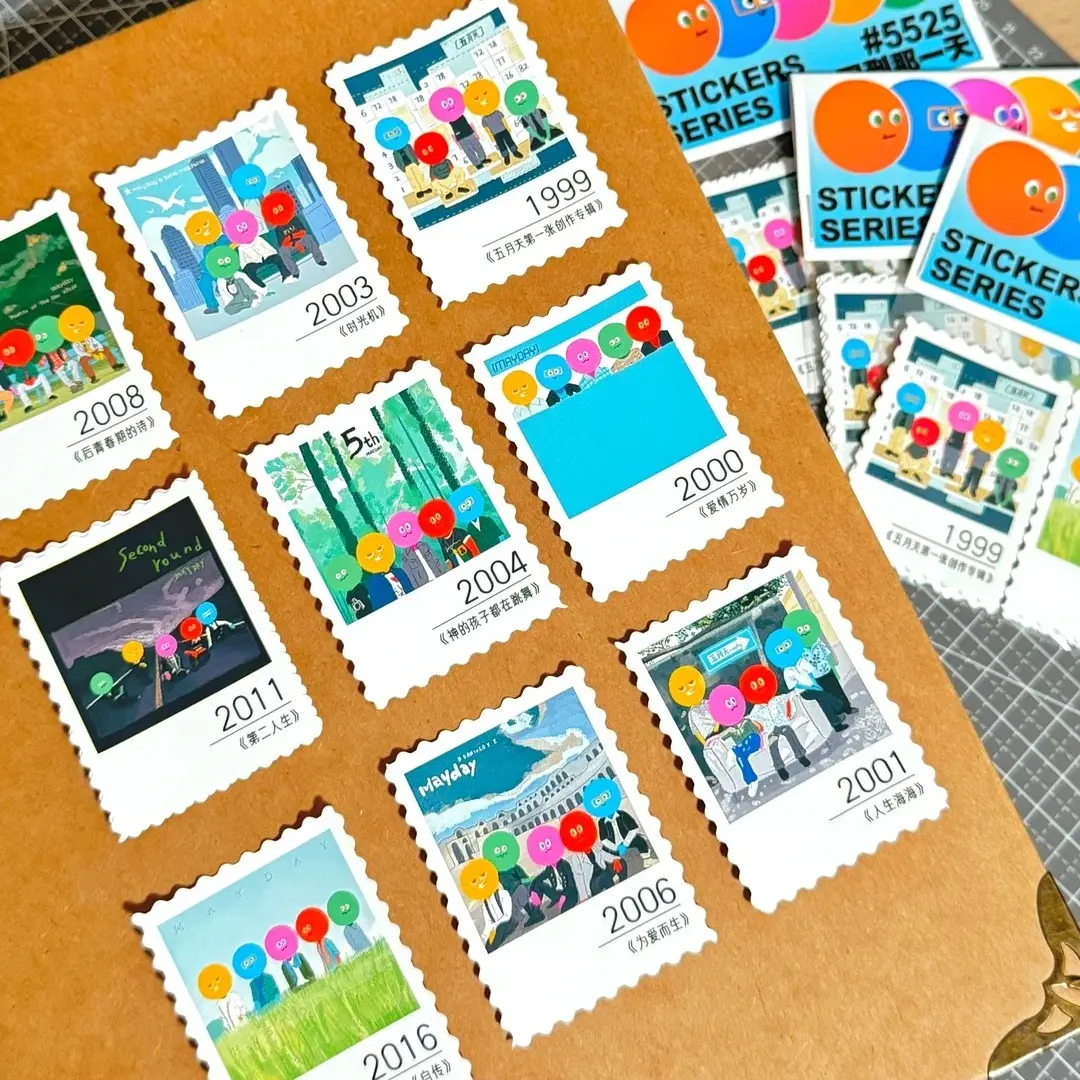
Perforated stamp stickers are half-cut (kiss-cut) sheets with a fixed serrated border that mimics vintage postage stamps. The central production decision is understanding that the innermost tooth point — not the outer sheet edge — is your functional design boundary. Open the product in Popecho's onsite editor to load the exact canvas and die-cut mask for your chosen size variant, then build your artwork inward from there. Start with at least 8 pieces to proof the stamp-edge print before scaling up.
What This Subtype Actually Demands
Most die-cut stickers give you a single clean silhouette as your cut boundary. Perforated stamp stickers give you a toothed perimeter — and that changes everything about where your artwork can safely live. The serrated edge is not decorative trimming added after the fact; it is the die-cut path itself, mechanically cut through the sticker layer while the backing sheet stays intact. The tooth size and pitch are fixed per template, not something you can redraw or scale. That means the innermost point of each tooth is the real edge of your printable art space, and designing to the outer sheet boundary will put content inside the cut zone. The vintage postage stamp aesthetic also carries its own design logic: high-contrast faces, retro colour palettes, and postmark-style overlays read correctly here in ways that would feel out of place on a standard smooth die-cut.
Setting Up the Artwork
Open your chosen size variant in Popecho's onsite editor and the exact canvas loads automatically — including the serrated border mask for that specific stamp series (1311 through 1819). You do not need to construct the tooth path yourself; the die-cut outline is already placed inside the editor when you select the half-cut stamp sticker variant. The safe zone also snaps into position automatically, pulling inward from the innermost tooth point. Keep all critical content — character faces, text, denomination numbers, postmark overlays — at least 2–3 mm inside that inner boundary to clear the clip risk at the perforation edge.
For bleed, extend background fills 2 mm beyond the trim line so colour runs edge-to-tooth without a white gap. Work in CMYK at 300 DPI minimum. Accepted formats are PNG, JPG, and PSD. One practical note: the white stamp border frame that appears around the stamp face is part of the die-cut mask, not an additional printable area — do not try to colour-match or extend your design into it. Design inward from the teeth, not outward toward the sheet edge.
Surface and Production Decisions
The half-cut (kiss-cut) process cuts through the sticker vinyl only, leaving the backing intact. The full sheet ships as a single unit, and the stamp peels cleanly when the buyer lifts the corner. This is a production strength, but it comes with a packaging note: treat the backing sheet as the structural unit during shipping and display. Premature peeling can happen if sheets are bent along the tooth path.
The coated sticker stock rewards solid, high-contrast artwork at the stamp face. Because the white border frame is a fixed aesthetic element of this format, designs that rely on colour continuity across the border into the backing area will not read as intended — plan your composition to work within the stamp face as a self-contained frame. Retro palettes with warm paper tones, aged ink colours, and deliberate value contrast between the stamp face and its subject tend to read strongest in the format and elevate perceived collectible value for buyers. Postmark-style overlays, country or series text, and denomination numerals placed inside the stamp face are native design moves here — they are not just decoration; they tell buyers this sticker was designed for the format rather than adapted from something else.
What Trips Creators Up
Treating the outer sheet edge as the design boundary. The tooth tips extend outward from the stamp face — artwork placed near the outer edge ends up inside or behind the perforations. Use the innermost tooth point, enforced by the safe-zone overlay in Popecho's editor, as your real design edge.
Soft or low-contrast detail near the stamp border. Fine lines, gradient fade-outs, and thin text placed close to the serrated edge tend to get partially clipped or visually absorbed into the tooth pattern. Keep detailed elements well inside the 2–3 mm inner margin.
Skipping a proof run before bulk. The stamp tooth path is complex; small artwork registration shifts read more visibly on a serrated edge than on a smooth die-cut. Popecho's MOQ is 8 pcs — use that minimum to proof the edge print and check face placement before committing to larger quantities.
Routing bulk custom orders through standard checkout. Orders of 500 pcs or more require contacting Popecho's batch custom channel before placing the order. Standard per-unit pricing does not apply at that tier, and placing it through the regular flow will stall fulfilment.