Custom Cold Drink Glass: File Setup for Curved UV Print
Custom Cold Drink Glass: File Setup for Curved UV Print
How canvas dimensions, colour mode, and wrap logic change the final result on real glass.
TL;DR
Custom cold drink glasses from Popecho are UV-transfer printed on two distinct glass bodies — a 350ml flared-rim tumbler and a 500ml straw can glass — each with its own curved-width canvas spec. The single decision that matters most before you upload is colour mode: CMYK files are auto-converted and will visibly desaturate. Open your chosen variant in Popecho's onsite editor, confirm the correct canvas loads, and upload a 300 DPI RGB PNG before ordering your proof unit.
What This Subtype Actually Demands
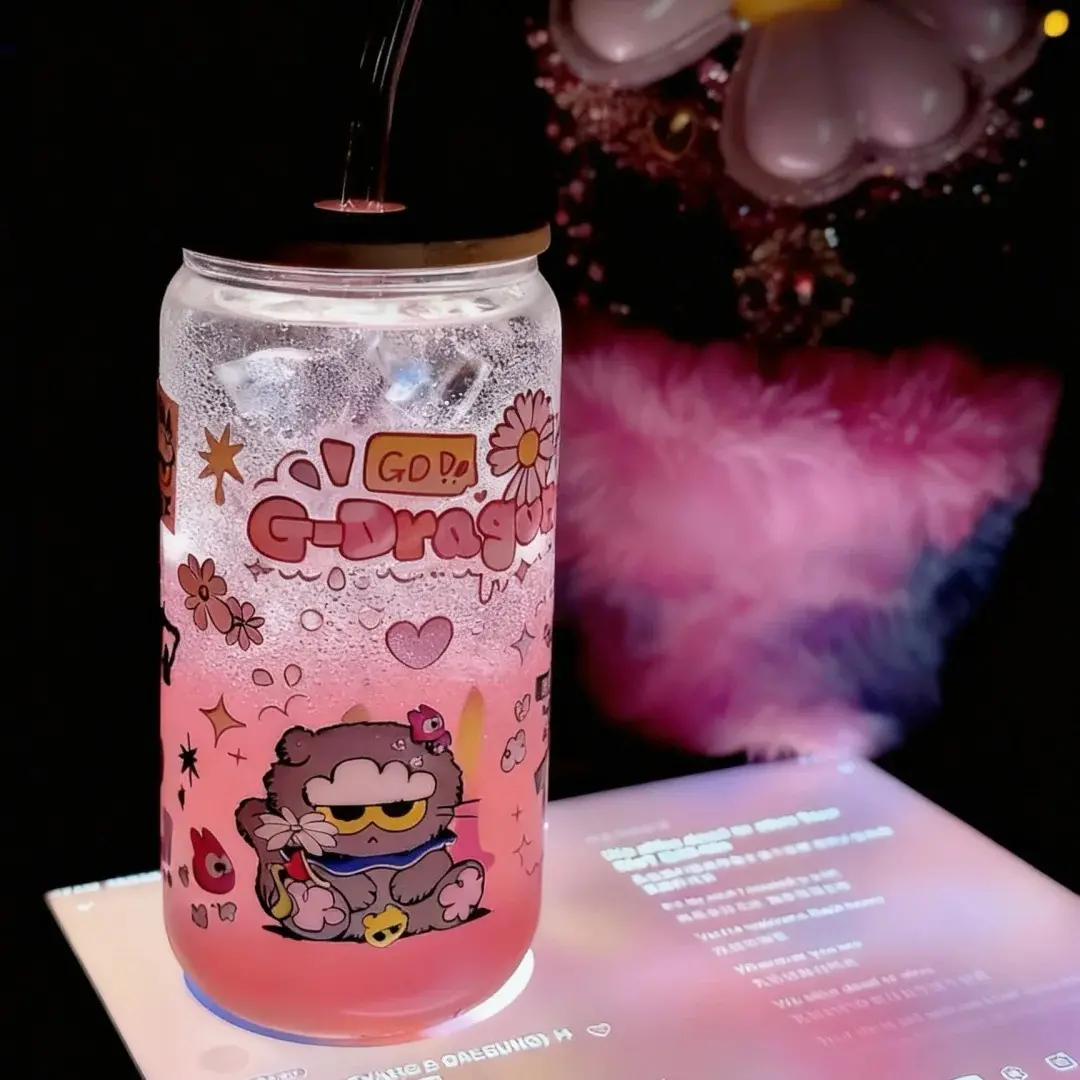
UV-printed drinkware is not a flat collectible. The art wraps a cylindrical body, which means every dimension in your file maps to a curved surface rather than a flush print plane. Both glass styles share the same product listing, but they carry different canvas specs: the flared-rim tumbler needs a 70mm (H) × 60mm (curved W) art area, while the straw can glass takes a wider 70mm (H) × 80mm (curved W) canvas. Use the wrong dimensions and the image distorts or misaligns as it rounds the glass body.
There is also a second layer of design reality unique to drinkware: your art will be viewed backlit by coloured liquid, not against a white screen. A design that reads well as a flat JPEG can look muddy or overworked once iced tea fills the glass behind it. Plan for that viewing condition from the first sketch.
Setting Up the Artwork
Popecho's onsite editor loads the correct curved-width canvas automatically when you select your glass variant — the flared-rim and straw can glass each snap to their respective art boundaries, so there is no manual resizing step between variants. A template catalog is available inside the editor, which is a practical starting point if you want to see how a well-formed design sits within the wrap area before you import your own artwork.
Resolution target is 300 DPI; the recommended pixel dimensions are 827×709px for the tumbler and 827×945px for the straw can glass. Upload as RGB. CMYK files are accepted but auto-converted on ingest, and that conversion consistently pulls saturation out of the result — especially from rich mid-tones and skin tones. Convert to RGB in your design tool before uploading rather than relying on Popecho's ingest conversion to preserve your palette.
For background handling, a transparent-background PNG lets the glass material show through wherever you have no ink. A white-background PNG prints a solid white base under the art. A filled JPG background prints that colour. None of these is wrong — but all three read differently once the glass has liquid in it, so choose with that in mind. Keep all text and fine detail at least 20px inside the art boundary; the edge of the wrap area curves sharply, and anything closer risks distortion or cracking after transfer.
Surface and Production Decisions
UV transfer produces crystal-clear, full-colour art with a hand-polished finish — colours appear to sit inside the glass surface rather than on top of it, which is the visual quality that separates this process from decal or paper-label approaches. The practical limit: neon and fluorescent tones, and any tint lighter than roughly 20% brightness, will appear more muted on the finished glass than on screen. If your design relies on punchy highlights or near-white fills, push those values richer in your RGB file before uploading.
Semi-transparent fills and ink-heavy zones carry an additional risk on glass: heavy coverage or partially transparent layers can reduce both print clarity and the adhesion of the UV transfer film to the glass surface. Solid fills and fully transparent areas are the most reliable. If your art uses gradient washes or watercolour-style texture, test with a single-unit proof — MOQ is one unit, so proofing before a volume run costs almost nothing relative to the risk.
The straw can glass variant adds bamboo lid, glass straw, cleaning brush, and inner foam packaging. None of those accessories have a print surface — art wraps the glass body only. The flared tumbler ships in a carton box with foam. Packaging differences are worth noting when you are planning gift sets or event drops.
What Trips Creators Up
Uploading a CMYK file and assuming the colours will hold. Popecho's editor flags profile mismatches on ingest and converts automatically, but the conversion pulls saturation from warm and vibrant tones in ways that are difficult to predict. Always export RGB from your design tool.
Fine text and hairline details on the curved surface. Small English lettering and dense line patterns that look crisp on screen lose legibility after UV transfer wraps the curve. Test any text smaller than roughly 8pt at actual print size before committing.
Previewing the design on a white background. Glass with liquid behind it reads completely differently from a white mockup. Check your design against a mid-tone or coloured liquid background before finalising.
Mixing canvas specs between the two glass styles. The flared tumbler and the straw can glass use different curved-width dimensions. If you build art for one and upload it to the other without adjusting, the wrap will misalign. Popecho's editor loads the correct canvas per variant — select your glass style first, then import your file.