Die-Cut Sticker File Setup: Silhouette, Border, and Size
Die-Cut Sticker File Setup: Silhouette, Border, and Size
How transparent backgrounds, border color, and DPI targets combine to define your finished cut shape.
TL;DR
A custom die-cut sticker from Popecho is cut to your artwork's exact silhouette across six sizes from 4 cm to 15 cm, finished with a gloss laminate and a selectable 2 mm printed border. The decision that changes the final result most is whether your PNG carries a transparent background: transparent produces a clean shaped cut, while anything opaque produces a halo or rectangular boundary. Upload your artwork into Popecho's onsite editor, use the Smart Cutout tool if your source file has a background, then confirm your border color before submitting.
What This Subtype Actually Demands
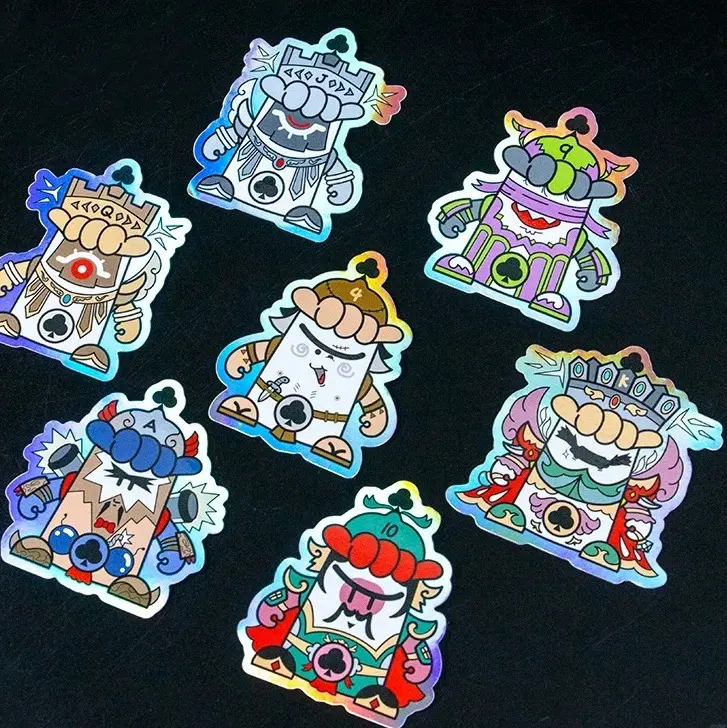
Die-cut stickers are not sheet stickers with a fancy crop. Each unit is individually cut to follow the uploaded artwork silhouette — no background rectangle, no fixed circle, no residual white field around the subject. That makes them ideal for laptop surfaces, water bottles, and packaging where the space around the art should read as negative space, not product.
Two production facts run the whole workflow here. First, the die-cut outline is driven entirely by what your file presents as the subject edge: a clean transparent-background PNG produces a sharp shaped cut; a white-background PNG produces a white halo; a JPG is cut to its image boundary. Second, the ~2 mm printed border that Popecho adds around the silhouette before cutting is a selectable color — it functions simultaneously as a production margin and a visible design element. Treat it as part of the finished piece, not an afterthought.
Setting Up the Artwork
Pixel dimensions must match the 300 DPI targets for your chosen size tier: 4 cm → 472 px, 6 cm → 709 px, 8 cm → 945 px, 10 cm → 1181 px, 12 cm → 1417 px, 15 cm → 1772 px on the longest edge. File size ceilings are 2 MB for the 4–8 cm range and 4 MB for 10–15 cm.
Open the product in Popecho's onsite editor and the die-cut boundary for your selected size loads immediately as a live guide — the 2 mm border zone is visible so you can see exactly how close your key art sits to the cut edge before submitting. Keep any detail you want fully visible at least 2 mm inside that boundary.
If your source artwork is not already on a transparent background, tap Smart Cutout inside the editor after uploading. Popecho's tool removes the background automatically and converts the result to a transparent-background PNG. Review the auto-cutout result before confirming — complex or busy backgrounds occasionally need a manual touch-up, which you can do in any external image editor and re-upload as a clean PNG. Color mode must be RGB; CMYK uploads cause hue and saturation errors at production.
Surface and Production Decisions
The dual-layer substrate — 120g glossy coated face paper bonded to a 100g non-dry adhesive backing — gives these stickers a noticeably rigid, premium feel compared to thin vinyl. The gloss laminate on the face side intensifies saturated colors, which is a visual benefit for most character and illustration work but requires a calibration step when your palette includes near-neon or out-of-gamut hues.
Gloss laminate shifts the perceived saturation of extremely bright digital colors downward. If your design was built in a wide-gamut digital environment with fluorescent pinks, electric blues, or screen-optimized greens, expect those tones to print slightly muted. Submitting in RGB mode is mandatory — it preserves the widest gamut Popecho's print process can capture. For designs where specific bright colors are central to the character's identity, ordering a small physical proof run (MOQ is 20 pcs) before committing to a larger batch is the lowest-risk path.
The border color selection happens inside the editor at order time. One color applies uniformly across every sticker in that order batch — you cannot vary the border color per sticker within a single order.
What Trips Creators Up
Wrong pixel dimensions for the size. Uploading a low-resolution file for a 15 cm sticker produces visibly blurry print output. Check the DPI targets above and resize your canvas before uploading rather than letting the editor scale up a small file.
CMYK source files. If your artwork originated in a print layout program set to CMYK, convert to RGB before uploading. CMYK submissions produce washed-out, hue-shifted output that does not match screen previews.
Over-complex silhouettes at small sizes. Thin spikes, stray hair wisps, and intricate lace edges that look sharp at 15 cm may not cut cleanly at 4–6 cm. Simplify the subject edge slightly for small-size variants rather than using the same artwork file across all tiers.
Treating the border as invisible. The 2 mm stroke is printed and visible in the final product. Choosing a white border against a white surface effectively hides it; choosing a contrasting color makes it a bold outline. Preview your border color selection inside Popecho's editor before finalizing — it shapes the finished sticker as much as the artwork itself.