Mini Pillow Charm File Setup: Seam, Safe Zone, and Fabric Print
Mini Pillow Charm File Setup: Seam, Safe Zone, and Fabric Print
The seam allowance eats your artwork edge — here is how to keep the face panel clean.
TL;DR
A custom mini pillow charm is a fabric-stuffed, keychain-ready piece printed on a single face panel and sewn shut on all four sides. The critical production decision is safe-zone discipline: the outer 5–8 mm disappears into the seam allowance, so any detail you place there is gone in the final charm. Open the product in Popecho's onsite editor, load your artwork against the safe-zone overlay, and confirm full background coverage before submitting — that is the fastest path to a clean result.
What This Subtype Actually Demands
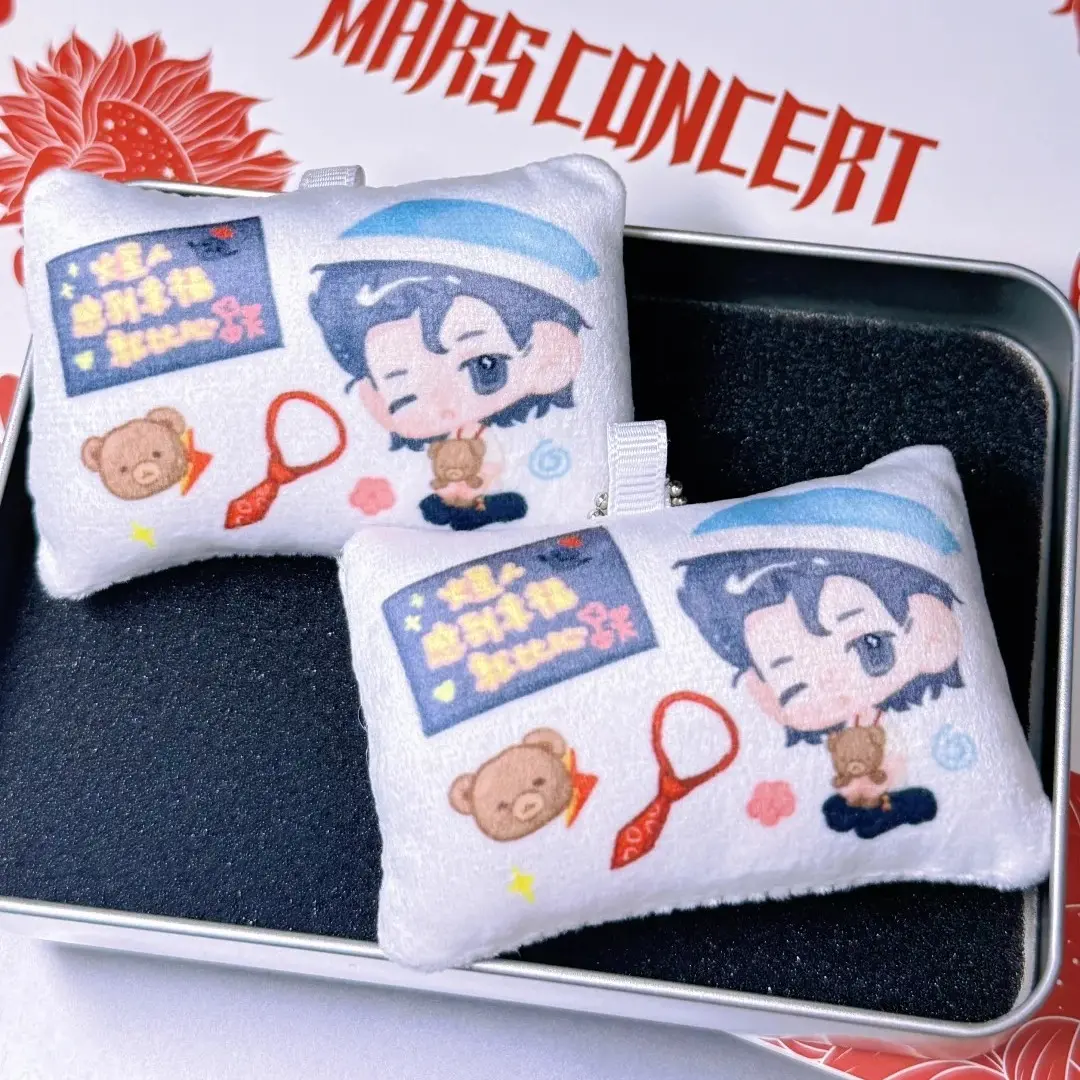
A mini pillow charm is not a flat badge or a rigid acrylic piece — it is a sewn object, and that changes everything about how the print face behaves. The artwork is printed on a flat fabric panel, then the panel is folded, sewn along all four edges, and stuffed with PP cotton. That construction means the outer margin of your canvas is physically consumed by the seam. What you see on screen as the full artwork area is not what the buyer sees hanging from their bag. Only the interior region — inside the seam allowance on every side — is visible in the finished charm.
The no-squeaker fill type (the standard option here) keeps the charm fully soft and compressible, which matters for bag-charm and lanyard use where a rigid or noisy insert would be intrusive. The K-pop fan support context this product comes from means the face panel is read at a glance — typically while the charm is moving on a bag — so legibility and a clear focal element are more important than decorative edge detail.
Setting Up the Artwork
Open the product in Popecho's onsite editor and the safe-zone overlay loads automatically with the variant canvas. That overlay is your primary working boundary — treat it as the real edge of your design, not the outer canvas limit.
A few setup habits that matter at this scale:
- Keep focal elements — faces, names, character art — centred well inside the safe zone. The seam margin runs approximately 5–8 mm on every side. Anything that creeps into that band will be sewn over.
- Use full-coverage background art or a deliberate solid background colour. Any area of the print face that carries no ink will reveal the base fabric tone. If your design has negative space you intended as white, fill it explicitly — fabric white and print white are not the same thing.
- Design in RGB for your working file. Popecho's production pipeline handles the colour conversion for fabric printing, so you do not need to convert manually before upload.
- Bold, high-contrast art reads most reliably at this size. The charm body is small, and the fabric weave softens very fine line work. Keep critical text at a readable weight and avoid relying on details thinner than roughly 1 mm at finished scale.
Because the editor loads a single front surface (no back panel on this product), your entire artwork effort goes into that one face — which also means there is no second surface to carry overflow information.
Surface and Production Decisions
The print method here is sublimation or direct-to-fabric on the face panel. That process delivers strong colour vibrancy and handles gradients and photographic art well, but the fabric substrate introduces a visible weave texture on close inspection. Solid flat colours appear slightly softer than they would on a hard-surface merch piece, and very thin lines or very small type can lose crispness at the finished pillow scale.
The practical consequence for design: treat this like designing for a soft-goods product rather than a hard badge. Photographic idol portraits and bold graphic text both translate reliably. Intricate linework, small supporting text, and fine halftone gradients are the elements most likely to disappoint when the charm arrives.
The sewn-edge assembly also means the pillow thickness and final shape are determined by the PP cotton fill density — not by anything in your artwork file. You cannot control the puff level through file submission. What you can control is whether the face panel looks intentional when the charm is stuffed and hanging, which circles back to safe-zone discipline and background coverage.
Production runs approximately 18 days. MOQ is 1 piece, so sampling a single unit before committing to a larger run is a straightforward move at this price point.
What Trips Creators Up
Artwork bleeds into the seam and disappears. The outer canvas area looks usable on screen, but the sewing process consumes it. Work inside the safe-zone overlay in Popecho's editor — do not treat the canvas edge as a design boundary.
Unintentional fabric show-through. Designers leave transparent or white areas expecting a clean white background. Fabric base colour reads through any untreated region of the print face. Fill every area deliberately.
Fine text placed near the charm edge. Names, dates, or fandom tags written small and positioned near the perimeter hit two problems at once: the seam absorbs the location, and the fabric substrate softens the letterforms. Move critical text inward and increase the weight.
Assuming the back panel carries additional art. This product has a single printable front surface. There is no reverse side for secondary information — plan your composition so one face carries the full message.