
Phone Strap Clip File Setup: Silhouette and Size
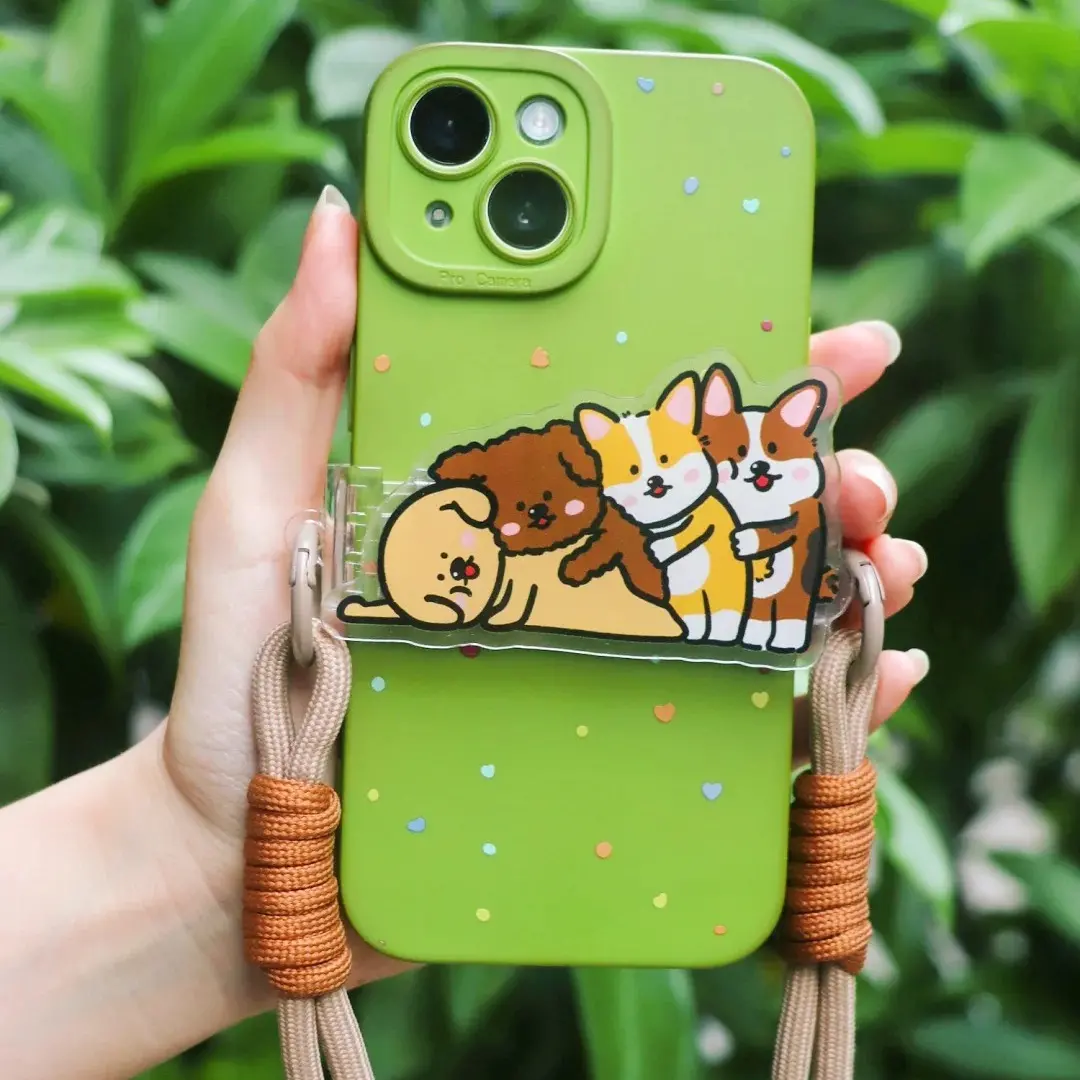
Phone Strap Clip File Setup: Silhouette and Size
Why transparent PNG, panel dimensions, and lanyard colour are three separate decisions.
TL;DR
A custom phone strap clip is a die-cut acrylic panel clipped to a phone back, with a braided lanyard loop for crossbody carry. The single biggest production decision is whether your uploaded file is a transparent PNG — that one choice determines whether the die-cut follows your character silhouette or a plain rectangle. Keep the panel within the functional size window (≥60 mm wide, 23–80 mm tall), pick your lanyard colour at order time, and your file is ready to go.
What This Subtype Actually Demands
A phone strap clip is not a decorative flat charm — it physically mounts to the back of a phone and carries a braided lanyard through a side slot. That functional role creates two hard constraints that don't exist for standees or keychains. First, the panel height window is narrow: below 23 mm the clip hardware is exposed and the product looks unfinished; above 80 mm the panel starts blocking the camera module. The sweet spot is around 60 mm tall. Second, the width floor is 60 mm — narrower panels won't grip the phone back cleanly.
The die-cut silhouette is the defining visual feature: the acrylic is cut along the artwork outline, not a rectangle. That cut is entirely controlled by the file you upload, which makes background handling the single most consequential file decision in this product type.
Setting Up the Artwork
Start inside Popecho's onsite editor — there's one template in the catalog for this variant, and it loads the size guide and safe-zone reference for the phone back clip canvas. Open it before touching any art file.
Canvas maximum: 75 × 75 mm (886 × 886 px). DPI: 300. Colour mode: RGB — CMYK files will shift in saturation and brightness at production with no warning in the upload step. Stay in RGB.
Background handling is the decision that shapes everything else:
- Transparent PNG → die-cut follows the character silhouette. This is almost always what you want for a character-art clip.
- White-background PNG → die-cut follows the white boundary, giving you a white fill around the art.
- JPG → die-cut follows the image rectangle and you get a square or rectangular panel edge.
Popecho's editor also offers an AI background-cutout tool. It works well on simple solid backgrounds, but complex or gradient backgrounds often produce ragged edges. If the cutout preview looks off, close it, manually pre-cut your PNG in your art software, and re-upload the transparent file directly.
Keep key art pulled away from the very edge of the canvas. The die-cut runs close to the silhouette boundary, and a ~2 mm transparent acrylic border is added automatically at production — content that bleeds to the artwork edge risks clipping.
Surface and Production Decisions
The panel is layered acrylic: a 1 mm base with a 2.5 mm printed top layer. The glossy acrylic surface is part of the product's character, but it comes with two practical notes.
First, minor surface micro-blemishes are inherent to the material. Popecho's after-sales policy explicitly does not classify them as defects. If you are sourcing for a high-scrutiny collector audience, order one unit first to calibrate expectations before scaling.
Second, colour fidelity on glossy acrylic is good across most palettes, but it has edges. Very pale tones — Photoshop eyedropper values below around 20 — and fluorescent or neon colours sit outside what the acrylic print process can accurately reproduce. Both will show visible colour shift on the finished panel. If colour matching is critical for your character's palette, order a single proof unit before committing to a larger run.
The lanyard is a hardware component, not a printable surface. You choose the loop colour — cream-yellow, light pink, light blue, light purple, or light green — at order time. There is no option to custom-print the lanyard cord itself. Treat lanyard colour as a product variant decision, not an artwork decision.
What Trips Creators Up
Uploading a JPG and expecting a character silhouette. JPG files don't carry transparency. Popecho's production process will die-cut along the image rectangle, not the character outline. Always export a transparent PNG for character-art clips.
Trusting the AI cutout on a complex background. The background-removal tool handles solid and near-solid backgrounds cleanly. Busy backgrounds, patterns, or soft shadow edges often produce messy results that only show up after production. Check the preview — if it looks wrong, replace it with a manually cut transparent PNG.
CMYK mode slipping through. If your source file was ever touched by a print-production pipeline, double-check the colour mode before upload. A CMYK file will look normal in the editor preview and then arrive with boosted, shifted colours on the finished clip. Convert to RGB before uploading.
Panel sized outside the functional window. A panel that is too small exposes the clip mechanism; one that is too large covers the camera. The ≥60 mm wide, 23–80 mm tall window is a functional constraint — Popecho's editor size guide for this variant shows it clearly when you open the template.