
The 50-Unit Plushie Blueprint: From Sketch to Sold-Out for 2D Artists
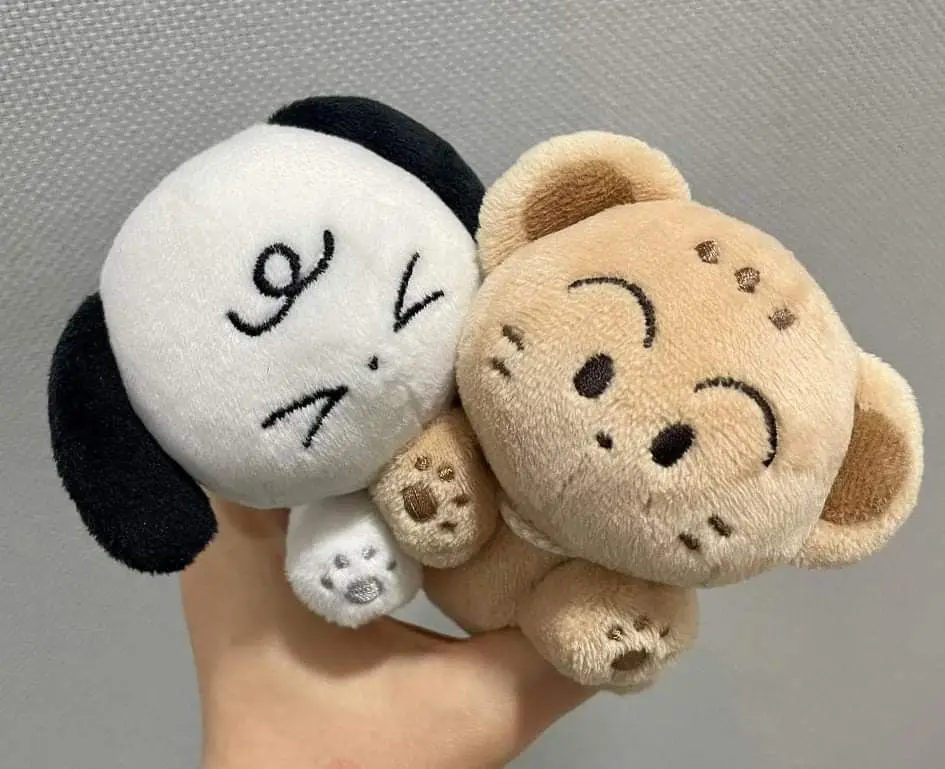
Collectible plushies have shifted from a toy category to a collector one, and that changes the math for creators. This blueprint covers how to convert a 2D character into a plush that looks like it, why a 50-unit run fits an artist still building an audience, and the file, fabric, and sampling decisions that decide whether it sells out.
Table of Contents
- Why plushies read as collectibles now
- Why the "flat face" result keeps happening
- The Match-the-Line rule: mapping your drawing to seams
- 20D vs 50D: what fabric weight means for your OC
- PFAS compliance for plush
- Why a 50-unit run is the right first bet
- Getting through sampling
- Your pre-production checklist
- FAQs
Why plushies read as collectibles now {#collectible}
Adults between 18 and 35 are now the primary buyers of collectible plushies, buying them for shelves and convention hauls rather than for kids. That shift matters for pricing: a well-executed 6-inch plush of an original character can sell for $28 to $45 at a convention table, which is collectible pricing, not toy pricing. The margin math on 50 units in that range is compelling next to the $8 sticker stack many artists still rely on. The hard part is the conversion, getting from a flat drawing to a three-dimensional object that still looks like your character.
Why the "flat face" result keeps happening {#flat-face}
You send a character with big expressive eyes and a strong silhouette to a factory, and the sample comes back with a flat face, oddly spaced eyes, and a lumpy cylinder for a body. This isn't the factory's fault, it's a topology problem. Your 2D drawing contains no depth information, so the pattern-maker has to work out how to wrap flat fabric panels around a 3D form. Without guidance, they default to the simplest geometry available, usually a sphere for the head and a tube for the body, and neither looks like your character.
The Match-the-Line rule: mapping your drawing to seams {#match-the-line}
This is the most important technical idea in the article: every strong line in your 2D drawing is a potential seam in the 3D object. Wherever you have a clear visual boundary in the illustration, that boundary needs to correspond to a physical seam or panel edge in the plush pattern. If your character has a defined jawline, that jaw becomes a seam between the face panel and the chin gusset. If the eyes sit at a specific height relative to the nose, that proportion has to be locked into the pattern dimensions rather than left to interpretation.
What this means for your file prep:
- Provide front, back, and side profile views. The side profile is where most artists cut corners, and it's the most critical reference for getting head depth right.
- Mark seam lines directly on the illustration, on a separate layer, showing exactly where the face panel ends and the side head panel begins.
- Call out feature placement with measurements. "Eyes sit 40% down from the top of the head" is useful; a drawing alone isn't.
- Separate embroidery from print. Facial features are almost always embroidered, so linework needs to be simplified enough to translate cleanly to thread. Fine gradients don't survive the conversion.
Factories that do good work appreciate this level of detail. The ones that don't ask for it are the ones that produce flat faces.
20D vs 50D: what fabric weight means for your OC {#fabric}
Plush fabric is measured in denier (D), which describes the thread density of the outer shell, and that number affects how your character reads at a distance and how well it holds its shape.
- 20D minky is ultra-soft, has a visible pile, and photographs beautifully. The downside is that fine embroidery can sink into the pile and lose definition, so small eyes or intricate features can blur.
- 50D short-pile is tighter and stiffer, holding embroidery crisply. It suits detailed faces or hard geometric shapes, photographs slightly flatter, but looks cleaner in person at a table.
For most 2D artist OCs with expressive, graphic features, 50D is the safer starting point, and you can go softer on a second run once the pattern works. Fill matters too: PP cotton is standard, but for a shelf-collectible you want a slightly denser fill so the form holds its silhouette after handling. Ask your production partner to specify fill weight in grams per unit rather than just "standard fill."
PFAS compliance for plush {#pfas}
PFAS (per- and polyfluoroalkyl substances) restrictions tightened across the EU and several US states in 2026, and they apply to textile products including plush. If you plan to sell at European conventions or ship internationally, your fabric supply chain needs to be PFAS-compliant. You can't verify this from a swatch, it requires documentation from the mill, so working with a partner who already has compliant supply chains is basic risk management. One customs hold can wipe out the margin on an entire 50-unit run.
Why a 50-unit run is the right first bet {#moq-50}
Most factories want 100 to 300 units as a minimum, which is daunting if you've never sold a plush and aren't sure how your character will land with a live audience. At 50 units, you're testing the product, not betting the year on it. You bring them to two or three shows, watch which characters move and which sit, and get real data on pricing tolerance, then go back for a larger run with evidence behind it. The per-unit economics are tighter at 50, but the risk-adjusted return is better for an artist still building an audience: a sold-out run of 50 at $35 each is $1,750 gross, which is a proof of concept and a number to bring to your next production conversation. PopEcho's plushie development workflow is built around exactly this small-run, test-and-iterate logic, with a guided process from concept through sampling and fulfillment for artists not ready for factory-scale volumes.
Getting through sampling {#sampling}
The first sample will be wrong, and that's the nature of the 2D-to-3D conversion rather than pessimism. The first sample shows what the pattern-maker understood from your reference; the revision shows what they missed. Most plushies need two to three rounds before the pattern is locked, and each round takes time, so build four to six weeks of sampling into your timeline before you need product in hand. If your first convention is in August, submit final art in May.
Review on every sample:
- Silhouette match. Hold the sample next to your drawing. Does the outline read as the same character?
- Feature placement. Measure eye position, nose height, and ear placement against your reference dimensions.
- Seam visibility. Seams should be tight and hidden where possible. Visible seams on the face are a quality flag.
- Fill firmness. Squeeze the head. It should hold its shape; if it collapses, the fill ratio is too low.
- Embroidery definition. Look at the eyes under direct light. Are the thread edges clean or fraying?
Document every revision with annotated photos. "The left eye is 3mm too high" is useful; "it doesn't look right" isn't.
Your pre-production checklist {#checklist}
Before you submit anything, have these ready:
- Front, back, and side profile illustrations (clean linework, no gradients)
- Seam line annotations on a separate layer
- Feature placement measurements (percentages or millimeters)
- Embroidery-ready simplified facial features
- Fabric preference specified (20D or 50D, with color reference)
- Target finished size (height in inches or centimeters)
- Fill firmness preference (standard or dense)
- PFAS compliance requirement noted, if selling in the EU or compliant US states
- Sample revision budget and timeline confirmed
- Convention date locked so the production timeline can work backward from it
FAQs {#faqs}
What's the minimum number of plushies I should order for a first run?
A 50-unit run is the sweet spot for testing a character on the convention circuit: enough to generate meaningful sales data across two or three shows without the exposure of a 200-unit commitment on an untested design.
How many sample rounds should I expect?
Two to three is typical for a first-time plush. Detailed or asymmetric characters sometimes need four. Budget time and revision cost for at least three rounds before locking the pattern.
Can I use my regular illustration file as the plush reference?
Not directly. It needs to be adapted into front, back, and side profile views with seam annotations and simplified embroidery-ready features. A full-color gradient illustration doesn't give a pattern-maker enough to work from.
What's the difference between 20D and 50D plush fabric?
20D is softer with a longer pile, better for photography and shelf appeal. 50D is tighter and holds embroidery detail more crisply. For characters with detailed facial features, 50D is usually the better starting point.
Do I need to worry about PFAS if I only sell at US conventions?
It depends where. Several US states adopted PFAS restrictions on textile products in 2026. If you sell in California or New York, or there's any chance of international sales, PFAS-compliant fabric documentation is worth the effort.
How long does the full process take from art to product in hand?
Realistically 10 to 14 weeks from final art submission to delivered product, including two to three sample rounds. Rush timelines are possible but cost more and reduce revision flexibility.
What size plush sells best at Artist Alley?
6 to 8 inches is the convention sweet spot: large enough to display well, small enough for a tote bag. Under 4 inches loses facial detail; over 10 inches prices itself out of impulse-buy territory.
The artists who sell out their plush runs aren't necessarily the ones with the biggest followings, they're the ones who did the technical homework before the first sample shipped. Get your reference right, understand your seams, know your fabric, build in time for sampling, and treat a 50-unit run as the smartest way to test a physical product against a real audience before you scale. Learn more at popecho.art.