
Wood Grain Photo Frame: File Prep and Print Decisions
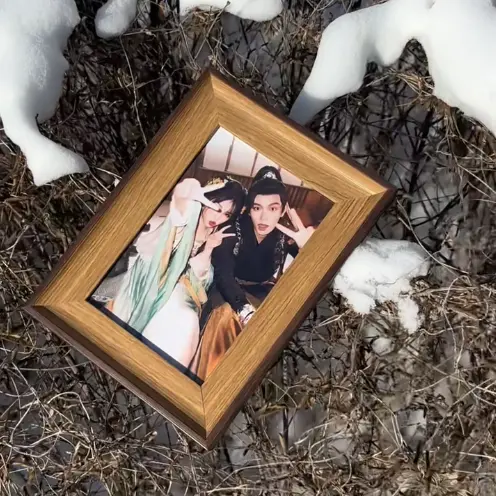
Wood Grain Photo Frame: File Prep and Print Decisions
How to set up your 110×160mm canvas so the insert prints clean and sits flush in the frame.
TL;DR
Popecho's custom wood grain photo frame is a complete desktop display unit — PVC-moulded frame, PS clear panel, printed photo insert, and swallowtail easel back — shipped ready to stand. The decision that matters most is colour mode and bleed discipline: submit RGB artwork at 110×160mm with 5mm bleed, keep critical content 8mm from the canvas edge, and avoid CMYK or neon values that print cannot reproduce. Open the product in Popecho's onsite editor and the bleed overlay loads automatically before you place your order.
What This Subtype Actually Demands
A wood grain photo frame is not a flat print-and-ship item. The insert — your artwork — must conform to a fixed 100×150mm slot behind a PS clear panel inside a PVC-moulded frame. That construction chain means three constraints arrive at once: the insert must be dimensioned precisely or it will not seat flush, the clear panel sits directly against the printed surface so any colour banding or edge strip is immediately visible, and the wood-grain finish is a moulded-PVC texture, not a printed wrap, so only the two available colours (sage green, natural) exist. Creators who treat this like a flat poster order tend to run into crop surprises and colour-shift complaints. Treating it as a precision insert for a fixed housing changes how you build the file.
Setting Up the Artwork
Your artwork canvas is 110×160mm — that is the upload size, not the finished insert size. The finished cut is 100×150mm, and the difference is 5mm of bleed on every side. At 300 DPI that translates to a canvas of 1299×1890 px with a finished area of 1181×1772 px.
Open the product in Popecho's onsite editor and the bleed boundary and safe-zone overlay load automatically for this variant, so you can see exactly where the trim line falls before committing. Keep all text and key design elements at least 8mm from the canvas edge — that is 3mm inside the bleed boundary. That clearance is not generous; the 25mm frame border already masks most of the outer edge, but crop variance at the insert slot is the real risk.
Background art must extend all the way to the full 110×160mm canvas edge. Do not add white borders or solid-colour blocks at image edges — after trimming they read as exposed strips against the inside of the frame border. Submit PNG or JPG, RGB colour mode only, recommended under 3 MB. (Portrait and landscape both work; the swallowtail easel back supports both orientations without any hardware change.)
Surface and Production Decisions
The photo insert is printed on glossy photographic stock — the same coated paper used for high-fidelity image reproduction. That is a strength for clean gradients and photographic art, and a constraint for neon palettes and very light tones.
Colour mode is the single highest-impact decision. Submit artwork in RGB. CMYK files are auto-converted during production, and the conversion reliably produces visible hue and saturation shifts. Popecho classifies that outcome as a normal production result, not a defect, so it falls outside after-sales coverage. Out-of-gamut colours and fluorescent values will not reproduce accurately regardless of file mode — if your design depends on neon accents, proof a single unit before committing to a run.
The PS clear panel in front of the insert is transparent by design and adds a subtle depth to displayed artwork. Minor surface micro-scratches are inherent to the PS material and are noted as outside quality-claim scope — worth setting that expectation with buyers if you are reselling.
The wood-grain texture of the frame itself is not customisable beyond the two colour variants. Choose the finish that frames your design's mood: sage green reads botanical and muted; natural wood grain reads warm and neutral.
What Trips Creators Up
Submitting CMYK artwork. The file uploads without error, but the auto-conversion shifts hue and saturation in ways that are hard to predict from screen. Switch your document to RGB before export — not just at save time.
Relying on neon or very light values. Any colour value below roughly 20% brightness or outside the standard RGB gamut will print noticeably different from your screen. Reduce saturation on accent colours and proof a single unit first.
No bleed on the background. Leaving the background at exactly 100×150mm creates a visible white or colour-shifted strip at the insert edges once trimmed. Extend every background layer to the full 110×160mm canvas.
Oversized insert prints. The finished insert must fit the 100×150mm slot. If you output at a slightly larger size — common when exporting from templates with padding — the insert will not seat correctly behind the panel.