Acrylic Coaster File Setup: Substrate, Bleed, and Background
Acrylic Coaster File Setup: Substrate, Bleed, and Background
How transparent, glitter, and rainbow boards change what your UV print actually looks like.
TL;DR
Custom acrylic coasters from Popecho are CNC die-cut 3mm acrylic — round or square, at 80mm or 100mm — printed with 7-color UV inkjet. The decision that trips most creators is background handling: on a transparent board, any unprinted area reveals the table beneath, and that changes how you should build your canvas. Open the product in Popecho's onsite editor, check the die-cut outline and bleed boundary for your chosen variant, keep critical elements at least 4mm from the raw canvas edge, and submit RGB at 300 DPI.
What This Subtype Actually Demands
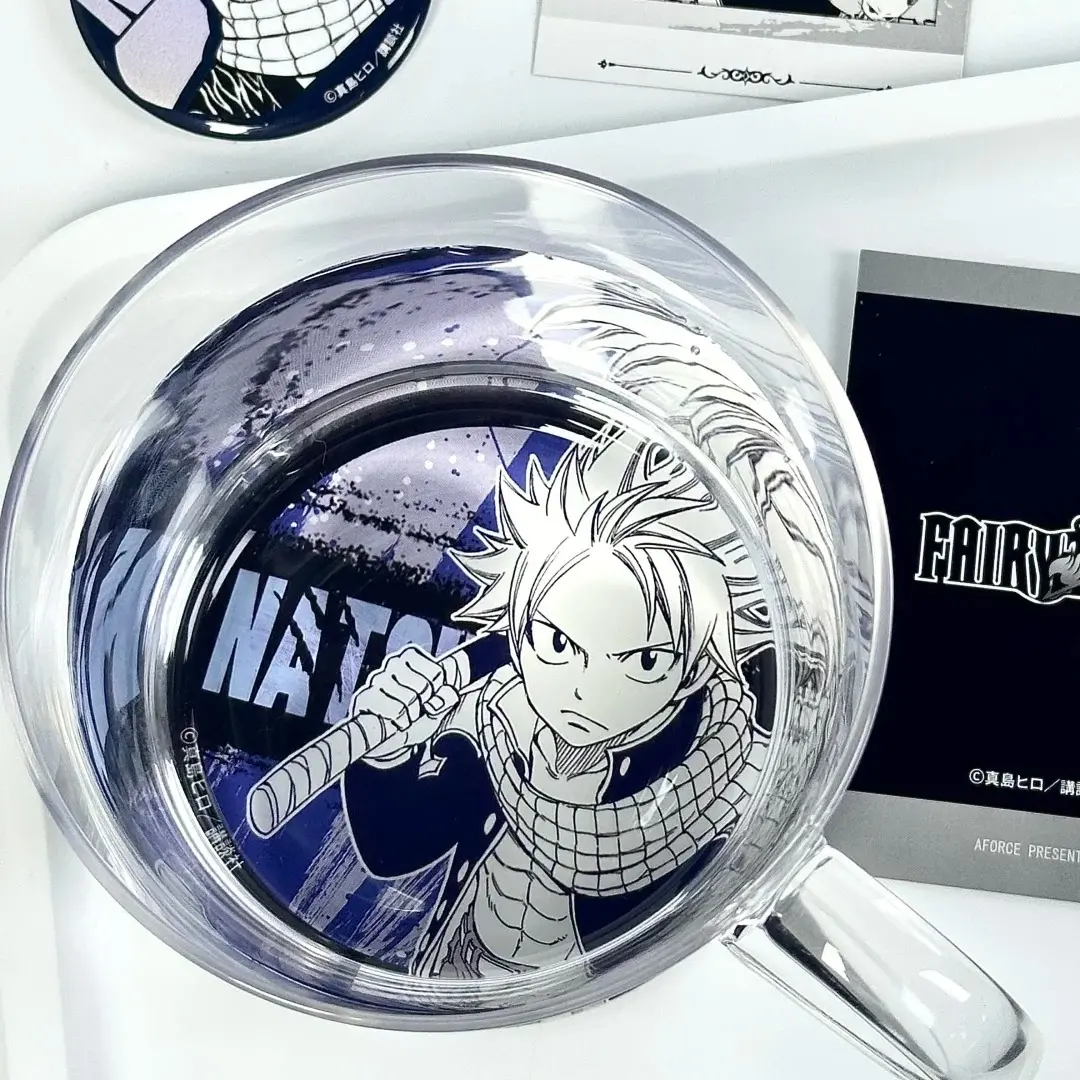
Acrylic coasters sit at the intersection of functional object and printed merch — the 3mm acrylic thickness and CNC-cut precision edge are structural requirements, not just aesthetic ones. That thickness is what makes the coaster work as a desk or cup mat; the CNC cut is what makes the round or square edge clean. Unlike a flat acrylic charm or standee, the coaster has no base slot, no hanging hole, and no front/back registration concern. What it does have is a substrate that actively participates in the final image: the board material — transparent, glitter, or rainbow — sits behind your UV print and shows through any unprinted or semi-transparent region of your artwork. Choose the board variant before you design the art, because the substrate is part of the composition.
Setting Up the Artwork
Canvas size includes bleed: build at 84×84mm for the 80mm finished size, or 104×104mm for the 100mm finished size. The CNC cutter trims to 80×80mm or 100×100mm, so those outer 2mm on each side are pure bleed — nothing important should live there. Keep text, faces, and key graphics at least 4mm from the raw canvas edge (2mm bleed plus 2mm safe margin inside it).
Popecho's onsite editor loads the die-cut outline and bleed boundary automatically when you open a variant — 80mm round, 80mm square, 100mm round, or 100mm square each have their own canvas pre-configured. You can also browse the template catalog (four starting templates are available) if you want a layout reference before committing your own artwork. The editor shows front and back views, so you can see how the coaster reads from both sides — useful for designs where the substrate color beneath the print matters.
File requirements: PNG or JPG, RGB color mode, 300 DPI minimum, maximum 2MB. Submit RGB — CMYK files are auto-converted on upload and the conversion reliably raises saturation and shifts warmth in ways that are hard to predict without proofing.
Surface and Production Decisions
The three board materials produce meaningfully different results even with identical artwork:
Transparent board is the most direct: unprinted areas become clear windows showing whatever surface the coaster rests on. Transparent-background PNG art reads cleanly here; a white-background PNG prints a solid opaque white field instead. Neither is wrong — they're different aesthetics. Pick intentionally.
Glitter board adds sparkle beneath the print. Heavy, fully opaque artwork masks most of the effect. If you choose glitter board, leave some transparent zones in the art so the substrate can read through. Full-bleed solid-color designs on glitter board are a wasted choice.
Rainbow board follows the same transparency logic as glitter but shifts through iridescent colors at different viewing angles. Thin linework or partially transparent gradients let the rainbow shift appear; solid-fill designs cover it.
The 7-color UV inkjet process delivers high color fidelity across the board, but very pale tones — near-white values below roughly 20% density — may not reproduce accurately. If your design relies on soft skin tones or subtle gradients, proof a single unit first. Popecho's MOQ is 1, so a single-unit proof is a real, low-cost option before committing to a larger run. Production lead time is approximately 18 days.
What Trips Creators Up
Critical elements too close to the edge. The CNC cutter follows the die line exactly, and ±0.5mm variance is normal. Any text or face placed inside the bleed zone — or even flush against the safe zone — will be at risk of being cropped. Position key content at least 4mm from the raw canvas edge, full stop.
Border strips appearing on the finished edge. If you add a color or white border block at the image edge (common when designing in canvas-filling mode), the bleed will expose that border as a visible stripe along the cut edge of the coaster. Do not add edge borders; let the bleed area be a true extension of your background.
CMYK submission. Uploading a CMYK file triggers auto-conversion that visibly warms and saturates the result. The shift is not subtle. Always submit in RGB — Popecho's editor and upload flow are both designed around RGB input.
Choosing the board without thinking about transparency. Ordering glitter or rainbow board and then submitting a 100% opaque full-bleed design means the substrate effect is invisible in the finished piece. Plan the board choice and the art transparency together, not separately.