
Acrylic Keychain Production: What the File Setup Guide Won't Tell You
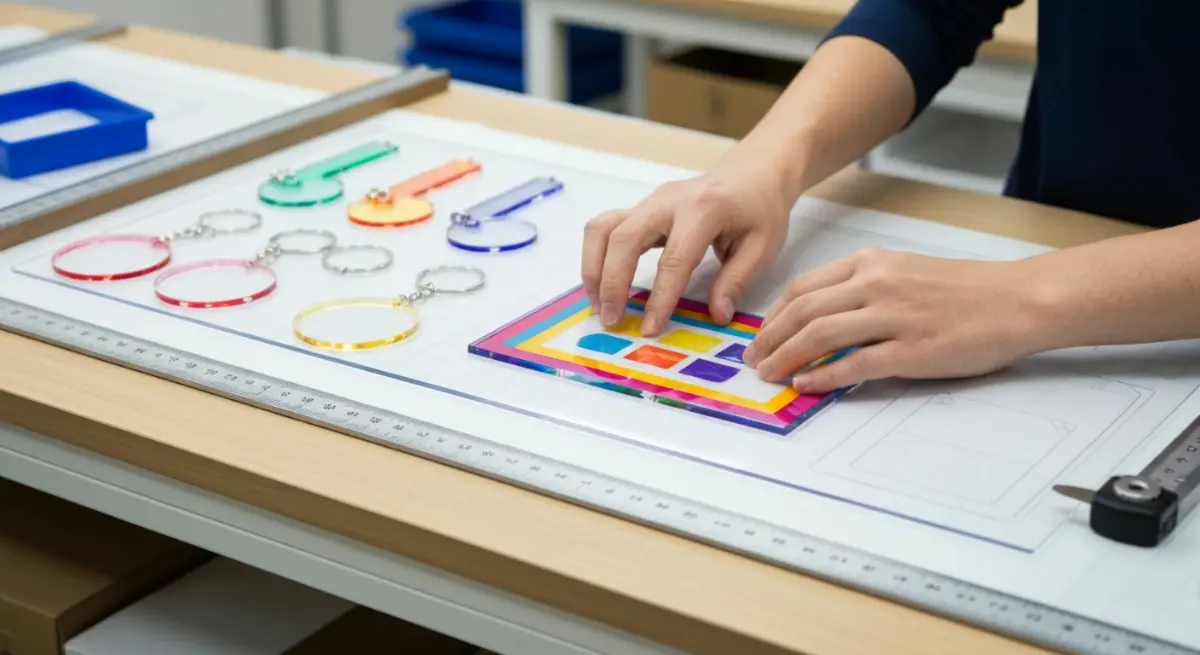
original by POPECHO
Table of Contents
The assumption that kills most first orders
How acrylic keychains are actually produced
File setup: the parts the template doesn't explain
Where most custom acrylic keychain orders go wrong
Thickness: the production decision most creators skip
Who acrylic keychains work for
FAQs
Acrylic keychains are one of the most forgiving products to design — until they aren't. The file setup guides tell you to add a bleed line and export at 300 DPI. What they don't tell you is why half of first-time orders come back with color deviation, clipped details, or a hole punched straight through a character's face.
This article covers the production realities behind custom acrylic keychains: what actually happens to your file between submission and finished piece, and which decisions you need to make before you send anything.
The assumption that kills most first orders
Most creators treat acrylic keychains like a straightforward print product. Submit art, get keychain. The template handles the rest.
That assumption is expensive.
Acrylic keychains involve at least three separate production stages — UV printing onto a substrate, laser cutting to shape, and hardware assembly. Each stage introduces its own failure point. Your file has to survive all three. A design that looks clean on screen can lose fine linework in the UV print, gain a visible white halo at the cut edge, or shift color significantly depending on the acrylic sheet's base tint.
The file setup guide tells you what to submit. It rarely tells you what happens after you do.
How acrylic keychains are actually produced
The substrate and its limits
Standard acrylic keychains use a clear or white acrylic sheet, typically 3mm to 5mm thick. The substrate is not neutral. Clear acrylic carries a slight blue-green tint under certain lighting conditions. White acrylic reflects UV ink differently than a paper substrate does.
This matters for your color decisions. What reads as warm ivory on screen may print cooler on clear acrylic. Saturated colors generally hold well. Pale pastels and skin tones are where color deviation shows up most visibly.
How the print layer sits inside the piece
UV printing deposits ink directly onto the acrylic surface. The ink cures under ultraviolet light and bonds to the substrate — it does not soak in the way inkjet ink soaks into paper.
The print layer sits on top of the material. The laser cutter works around it, not through it. Your cut line follows the shape of your artwork. Any ink extending past that line gets removed with the waste material. Any ink falling short of it leaves a visible gap between the print edge and the acrylic edge.
That gap is what bleed lines prevent. But bleed lines only work if you understand what they're actually doing.
File setup: the parts the template doesn't explain
RGB vs CMYK — and why it matters here specifically
UV printing on acrylic uses an RGB color workflow. Not CMYK. This is the opposite of standard offset printing.
Submit a CMYK file and the RIP software will convert it — but that conversion is not calibrated to your intent. Blacks flatten. Saturated blues shift toward purple. Skin tones go muddy.
Submit in RGB. Build your palette in RGB from the start. If you're working from a CMYK source file, convert it manually in Photoshop or Illustrator and check each color channel before exporting. Do not rely on automatic conversion.
PopEcho's production workflow accepts RGB print files natively, which removes one conversion step and reduces color deviation between your screen preview and the finished piece.
Bleed lines and cut tolerance
Standard bleed for acrylic keychains is 2–3mm beyond your cut line. Your background color, outermost design elements, and any fill that touches the edge must extend at least 2mm past the shape you want cut.
Laser cutters have a tolerance of approximately ±0.5mm on most production runs. That tolerance is real. It means your cut line can shift slightly in any direction. If your background ends exactly at the cut line, a 0.5mm shift toward the center leaves a white acrylic edge visible around the entire piece.
Extend your bleed. It is not optional.
Fine detail and minimum stroke width
This is where character IP designs fail most often. Fine linework — hair strands, thin outlines, small text, delicate shading — has a minimum reproducible stroke width in UV printing on acrylic.
At standard keychain sizes (roughly 60–80mm on the longest axis), any stroke below 0.3mm risks disappearing entirely in the print. At smaller sizes, that threshold rises.
If your design relies on fine detail for legibility — a character's facial features, small decorative elements near the edges — test your file at actual print size before submitting. Zoom to 100% in your design software. If you can't read the detail at that scale, the printer won't reproduce it either.
Where most custom acrylic keychain orders go wrong
Dark backgrounds and edge bleed
Dark-background designs are the most common source of visible production errors in acrylic keychains. A deep navy or black background that doesn't extend fully into the bleed zone will show a white acrylic rim around the finished piece. On a light-background design, this is barely noticeable. On a dark-background design, it reads as a defect.
If your design uses a dark background, extend it aggressively — at least 3mm past the cut line, not 2mm.
Gradients near the cut line
Gradients that fade to transparent near the edge of your design create the same problem as insufficient bleed. The transparent zone exposes the acrylic substrate, and cut tolerance can shift that exposed zone inward.
Either extend the gradient so it remains opaque through the full bleed zone, or terminate it before it reaches the cut area and use a solid fill for the bleed extension.
Hole placement
The hardware hole is punched or drilled after cutting. Its position is set by your file.
Most creators place the hole without checking whether it intersects a critical design element at production scale. A hole that looks safely clear of your character's head at 300% zoom can land directly on a facial feature at actual size.
Place your hole marker at actual production size. Check it against your artwork. Keep it at least 4mm from any design element you cannot afford to lose.
Thickness: the production decision most creators skip
Standard acrylic keychains are 3mm thick. Thick acrylic keychains — sometimes listed as 5mm — are a separate production category with meaningfully different hand-feel and perceived quality.
The difference is not just physical weight. Thicker acrylic holds a laser-cut edge more cleanly on complex shapes. Fine cutouts and narrow interior details hold their form better at 5mm than at 3mm, where thin acrylic sections can flex or chip under stress.
If your design has narrow interior cutouts — negative space within the shape, not just the outer silhouette — 5mm acrylic reduces the risk of breakage in production and in the hands of the end buyer.
Neither thickness is universally better. The right choice depends on your design's geometry and your buyer's expectations around hand-feel. PopEcho offers both acrylic keychains and thick acrylic keychains as separate product options, which lets you match the substrate to the design rather than defaulting to one or the other.
For more on how acrylic performs across different product formats, the PopEcho journal covers related production decisions in articles on acrylic standees and shikishi boards — both of which share substrate behavior with keychain production.
Who acrylic keychains work for
Artists and illustrators at Artist Alley — High-margin, low-weight, easy to display and transport. Character IP translates well to keychain format, and buyers treat them as collectibles rather than disposable merch.
Fan communities and OC creators — Acrylic keychains are one of the few formats where original character designs hold perceived value comparable to licensed IP. The physical object carries the design's identity.
Small brands and indie studios — Logo-based or mascot-based keychains function as practical promotional objects. They attach to bags and keys — wearable visibility without being worn.
Event organizers and convention vendors — Low MOQ production means you can test a design before committing to a full run. PopEcho supports orders from a single piece, which keeps dead inventory risk low.
Merch bundle creators — Keychains pair well with badges, stickers, and prints as bundle components. They add physical weight and perceived value to a package without significantly increasing shipping cost.
For creators building a full merch lineup, the PopEcho journal's articles on badge production and sticker formats cover complementary production decisions worth reading alongside this one. There's also a broader overview of merch development for beginners that addresses how to sequence your first product decisions.
FAQs
What file format should I use for a custom acrylic keychain order?
Submit as a high-resolution PNG or PDF in RGB color mode. 300 DPI minimum at actual print size. Avoid CMYK files — the conversion to RGB in the print workflow is not calibrated to your original intent and will introduce color deviation.
How much bleed do I need for an acrylic keychain?
A minimum of 2mm beyond your cut line, with 3mm recommended for dark-background designs. Laser cutting has a tolerance of approximately ±0.5mm, so insufficient bleed will show as a visible acrylic edge around your finished piece.
What is the minimum stroke width that will reproduce on an acrylic keychain?
At standard keychain sizes (60–80mm on the longest axis), strokes below 0.3mm risk disappearing in the UV print. Check your design at 100% scale in your design software before submitting.
What is the difference between standard and thick acrylic keychains?
Standard acrylic keychains are 3mm thick. Thick acrylic keychains are 5mm. The thicker substrate holds complex cut shapes more cleanly and has a noticeably heavier hand-feel. For designs with narrow interior cutouts or fine silhouette details, 5mm reduces the risk of breakage.
Can I order a single acrylic keychain to test my design?
Yes. PopEcho's on-demand production supports orders starting from one piece, which makes test runs practical before committing to a full production quantity.
Why does my keychain look different from my screen preview?
The most common causes are color mode mismatch (CMYK submitted instead of RGB), the slight tint of the acrylic substrate affecting pale or warm colors, and the difference between backlit screen rendering and physical UV-printed ink. Build and check your palette in RGB, and request a physical sample if color accuracy is critical to your design.
Where should I place the hardware hole in my design file?
Position the hole marker at actual production size — not zoomed in. Keep it at least 4mm from any design element you cannot afford to lose. Check it against your full artwork before submitting, particularly if your design has a character or focal element near the top edge.
original by POPECHO
Table of Contents
- The assumption that kills most first orders
- How acrylic keychains are actually produced
- File setup: the parts the template doesn't explain
- Where most custom acrylic keychain orders go wrong
- Thickness: the production decision most creators skip
- Who acrylic keychains work for
- FAQs
Acrylic keychains are one of the most forgiving products to design — until they aren't. The file setup guides tell you to add a bleed line and export at 300 DPI. What they don't tell you is why half of first-time orders come back with color deviation, clipped details, or a hole punched straight through a character's face.
This article covers the production realities behind custom acrylic keychains: what actually happens to your file between submission and finished piece, and which decisions you need to make before you send anything.
The assumption that kills most first orders
Most creators treat acrylic keychains like a straightforward print product. Submit art, get keychain. The template handles the rest.
That assumption is expensive.
Acrylic keychains involve at least three separate production stages — UV printing onto a substrate, laser cutting to shape, and hardware assembly. Each stage introduces its own failure point. Your file has to survive all three. A design that looks clean on screen can lose fine linework in the UV print, gain a visible white halo at the cut edge, or shift color significantly depending on the acrylic sheet's base tint.
The file setup guide tells you what to submit. It rarely tells you what happens after you do.
How acrylic keychains are actually produced
The substrate and its limits
Standard acrylic keychains use a clear or white acrylic sheet, typically 3mm to 5mm thick. The substrate is not neutral. Clear acrylic carries a slight blue-green tint under certain lighting conditions. White acrylic reflects UV ink differently than a paper substrate does.
This matters for your color decisions. What reads as warm ivory on screen may print cooler on clear acrylic. Saturated colors generally hold well. Pale pastels and skin tones are where color deviation shows up most visibly.
How the print layer sits inside the piece
UV printing deposits ink directly onto the acrylic surface. The ink cures under ultraviolet light and bonds to the substrate — it does not soak in the way inkjet ink soaks into paper.
The print layer sits on top of the material. The laser cutter works around it, not through it. Your cut line follows the shape of your artwork. Any ink extending past that line gets removed with the waste material. Any ink falling short of it leaves a visible gap between the print edge and the acrylic edge.
That gap is what bleed lines prevent. But bleed lines only work if you understand what they're actually doing.
File setup: the parts the template doesn't explain
RGB vs CMYK — and why it matters here specifically
UV printing on acrylic uses an RGB color workflow. Not CMYK. This is the opposite of standard offset printing.
Submit a CMYK file and the RIP software will convert it — but that conversion is not calibrated to your intent. Blacks flatten. Saturated blues shift toward purple. Skin tones go muddy.
Submit in RGB. Build your palette in RGB from the start. If you're working from a CMYK source file, convert it manually in Photoshop or Illustrator and check each color channel before exporting. Do not rely on automatic conversion.
PopEcho's production workflow accepts RGB print files natively, which removes one conversion step and reduces color deviation between your screen preview and the finished piece.
Bleed lines and cut tolerance
Standard bleed for acrylic keychains is 2–3mm beyond your cut line. Your background color, outermost design elements, and any fill that touches the edge must extend at least 2mm past the shape you want cut.
Laser cutters have a tolerance of approximately ±0.5mm on most production runs. That tolerance is real. It means your cut line can shift slightly in any direction. If your background ends exactly at the cut line, a 0.5mm shift toward the center leaves a white acrylic edge visible around the entire piece.
Extend your bleed. It is not optional.
Fine detail and minimum stroke width
This is where character IP designs fail most often. Fine linework — hair strands, thin outlines, small text, delicate shading — has a minimum reproducible stroke width in UV printing on acrylic.
At standard keychain sizes (roughly 60–80mm on the longest axis), any stroke below 0.3mm risks disappearing entirely in the print. At smaller sizes, that threshold rises.
If your design relies on fine detail for legibility — a character's facial features, small decorative elements near the edges — test your file at actual print size before submitting. Zoom to 100% in your design software. If you can't read the detail at that scale, the printer won't reproduce it either.
Where most custom acrylic keychain orders go wrong
Dark backgrounds and edge bleed
Dark-background designs are the most common source of visible production errors in acrylic keychains. A deep navy or black background that doesn't extend fully into the bleed zone will show a white acrylic rim around the finished piece. On a light-background design, this is barely noticeable. On a dark-background design, it reads as a defect.
If your design uses a dark background, extend it aggressively — at least 3mm past the cut line, not 2mm.
Gradients near the cut line
Gradients that fade to transparent near the edge of your design create the same problem as insufficient bleed. The transparent zone exposes the acrylic substrate, and cut tolerance can shift that exposed zone inward.
Either extend the gradient so it remains opaque through the full bleed zone, or terminate it before it reaches the cut area and use a solid fill for the bleed extension.
Hole placement
The hardware hole is punched or drilled after cutting. Its position is set by your file.
Most creators place the hole without checking whether it intersects a critical design element at production scale. A hole that looks safely clear of your character's head at 300% zoom can land directly on a facial feature at actual size.
Place your hole marker at actual production size. Check it against your artwork. Keep it at least 4mm from any design element you cannot afford to lose.
Thickness: the production decision most creators skip
Standard acrylic keychains are 3mm thick. Thick acrylic keychains — sometimes listed as 5mm — are a separate production category with meaningfully different hand-feel and perceived quality.
The difference is not just physical weight. Thicker acrylic holds a laser-cut edge more cleanly on complex shapes. Fine cutouts and narrow interior details hold their form better at 5mm than at 3mm, where thin acrylic sections can flex or chip under stress.
If your design has narrow interior cutouts — negative space within the shape, not just the outer silhouette — 5mm acrylic reduces the risk of breakage in production and in the hands of the end buyer.
Neither thickness is universally better. The right choice depends on your design's geometry and your buyer's expectations around hand-feel. PopEcho offers both acrylic keychains and thick acrylic keychains as separate product options, which lets you match the substrate to the design rather than defaulting to one or the other.
For more on how acrylic performs across different product formats, the PopEcho journal covers related production decisions in articles on acrylic standees and shikishi boards — both of which share substrate behavior with keychain production.
Who acrylic keychains work for
- Artists and illustrators at Artist Alley — High-margin, low-weight, easy to display and transport. Character IP translates well to keychain format, and buyers treat them as collectibles rather than disposable merch.
- Fan communities and OC creators — Acrylic keychains are one of the few formats where original character designs hold perceived value comparable to licensed IP. The physical object carries the design's identity.
- Small brands and indie studios — Logo-based or mascot-based keychains function as practical promotional objects. They attach to bags and keys — wearable visibility without being worn.
- Event organizers and convention vendors — Low MOQ production means you can test a design before committing to a full run. PopEcho supports orders from a single piece, which keeps dead inventory risk low.
- Merch bundle creators — Keychains pair well with badges, stickers, and prints as bundle components. They add physical weight and perceived value to a package without significantly increasing shipping cost.
For creators building a full merch lineup, the PopEcho journal's articles on badge production and sticker formats cover complementary production decisions worth reading alongside this one. There's also a broader overview of merch development for beginners that addresses how to sequence your first product decisions.
FAQs
What file format should I use for a custom acrylic keychain order?
Submit as a high-resolution PNG or PDF in RGB color mode. 300 DPI minimum at actual print size. Avoid CMYK files — the conversion to RGB in the print workflow is not calibrated to your original intent and will introduce color deviation.
How much bleed do I need for an acrylic keychain?
A minimum of 2mm beyond your cut line, with 3mm recommended for dark-background designs. Laser cutting has a tolerance of approximately ±0.5mm, so insufficient bleed will show as a visible acrylic edge around your finished piece.
What is the minimum stroke width that will reproduce on an acrylic keychain?
At standard keychain sizes (60–80mm on the longest axis), strokes below 0.3mm risk disappearing in the UV print. Check your design at 100% scale in your design software before submitting.
What is the difference between standard and thick acrylic keychains?
Standard acrylic keychains are 3mm thick. Thick acrylic keychains are 5mm. The thicker substrate holds complex cut shapes more cleanly and has a noticeably heavier hand-feel. For designs with narrow interior cutouts or fine silhouette details, 5mm reduces the risk of breakage.
Can I order a single acrylic keychain to test my design?
Yes. PopEcho's on-demand production supports orders starting from one piece, which makes test runs practical before committing to a full production quantity.
Why does my keychain look different from my screen preview?
The most common causes are color mode mismatch (CMYK submitted instead of RGB), the slight tint of the acrylic substrate affecting pale or warm colors, and the difference between backlit screen rendering and physical UV-printed ink. Build and check your palette in RGB, and request a physical sample if color accuracy is critical to your design.
Where should I place the hardware hole in my design file?
Position the hole marker at actual production size — not zoomed in. Keep it at least 4mm from any design element you cannot afford to lose. Check it against your full artwork before submitting, particularly if your design has a character or focal element near the top edge.
At PopEcho, production decisions are handled by specialists working directly with calibrated factory partners. The goal is not to simplify the process — it is to give you enough production knowledge to make the right decisions before your file leaves your hands. Learn more at popecho.art.